
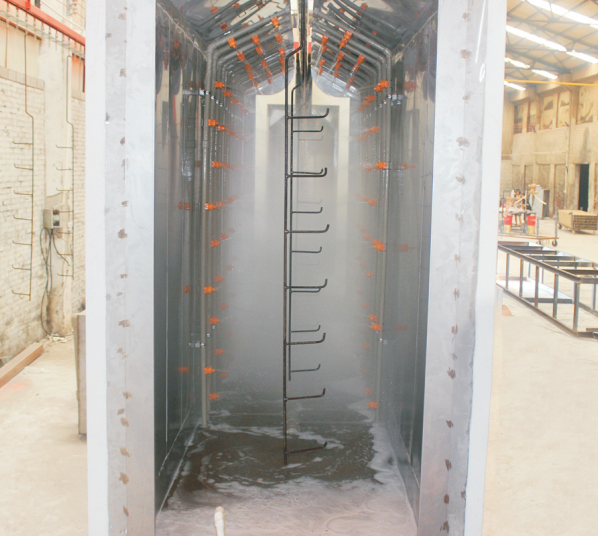
Scope of Painting Pretreatment: Definition, Process Range, and Impact on Coating Quality
When we talk about powder coating lines, many people focus on the spray booth and curing oven. But here's what we've learned from years of actual production experience: pretreatment is where most coating failures actually originate. We've seen countless projects where clients invested heavily in advanced spray guns and precise temperature control, only to watch coatings fail in the field because pretreatment wasn't done properly. The gap between what looks like a simple cleaning step and what it really demands in manufacturing is often underestimated.
Painting pretreatment is the foundation stage of any powder coating process that removes surface contaminants—oil, rust, oxidation, dust, and salt deposits—while chemically preparing the workpiece surface for optimal powder adhesion and long-term corrosion resistance. It includes multiple sequential steps: degreasing, rust removal, surface rinsing, chemical conversion (phosphating or chromate-free treatment), final rinsing, and thorough drying. Pretreatment does not just clean; it creates a micro-environment on the metal surface that allows powder particles to bond securely and retain their protective properties for years.
From our experience working with cabinet manufacturers, furniture makers, and aluminum processors across different markets, we've found that the difference between a coating that lasts five years and one that lasts fifteen comes down to pretreatment execution. When it's overlooked, you see pinholing, blistering, adhesion loss, and early corrosion creeping back. When it's done right, the coating stays intact even in harsh outdoor or corrosive environments.
This article walks through what pretreatment scope actually covers, how it changes based on material type, what goes wrong when corners are cut, and how to assess whether your pretreatment system is truly doing its job.
What Is Painting Pretreatment and Why Does It Matter?
Pretreatment sits at the very beginning of the coating process—after the workpiece arrives but before any powder touches it. Its purpose is specific: to remove everything that would prevent powder from sticking, and to create an ideal surface state for adhesion and durability.
Most people think of pretreatment as just "washing the part." It's actually much more strategic. A bare metal surface is reactive, contaminated, and prone to oxidation. Direct powder application to such a surface would result in poor adhesion, faster corrosion creep, and coating failure. Pretreatment transforms that hostile surface into one that attracts and holds powder reliably.
From our standpoint working with cabinet, furniture, and profile manufacturers, pretreatment is non-negotiable. We've sat through too many troubleshooting calls where the root cause wasn't the spray gun or the cure temperature—it was incomplete degreasing or insufficient rinsing. This is why we always tell customers: spend the engineering effort on pretreatment first, then optimize spraying parameters. Doing it backwards is almost always wasted effort.
The scope of pretreatment covers several distinct operations that must work in sequence, each with its own chemistry and control requirements.
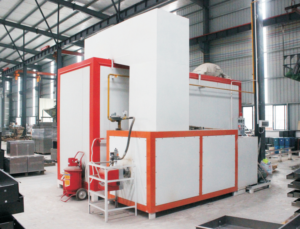
The Complete Process Range of Painting Pretreatment
Pretreatment is not a single action; it's a series of dependent steps. The exact sequence and intensity vary by material and contamination level, but the fundamental stages remain consistent.
Degreasing and Cleaning
Degreasing is the first critical step. It removes cutting oils, machining fluids, fingerprints, dust, and any organic film that would block chemical conversion. Without thorough degreasing, nothing else in pretreatment will work properly.
Degreasing can be done by alkaline chemical soak (the most common approach for batch or spray operations) or by spray washing under pressure. Alkaline degreasing emulsifies oils and suspends them in the solution, allowing them to be rinsed away. Temperature, chemical concentration, and contact time all matter. Cold alkaline degreasing takes longer; warm or hot alkaline solutions (typically 50–70°C) work faster but require more energy.
In spray-on systems (which we often integrate into conveyor lines), high-pressure alkaline spray removes both heavy oils and loose rust scale. In tank-based systems, parts soak in the degreaser, which is gentler but slower. Both approaches work; the choice depends on your workpiece size, production speed, and space constraints.
We've found that the temptation to skip or shorten degreasing is very common in shops trying to boost throughput. It's a false economy. One minute of incomplete degreasing creates hours of troubleshooting later when coatings fail. We always recommend verifying degreaser concentration and temperature weekly, and replacing it on schedule—old degreaser loses efficiency rapidly.
Rust Removal and Surface Preparation
For steel and iron workpieces, rust and oxide scale must be removed to expose clean base metal. Oxidized surfaces are porous and inconsistent; they don't form stable conversion coatings.
Rust removal can be accomplished by:
Acid pickling (acid dipping): Immersing parts in dilute sulfuric or hydrochloric acid dissolves rust and light oxide. It's fast, but requires careful chemical handling and disposal.
Spray acid washing: Some operations use spray-applied acid for localized or medium rust. Less chemical waste than full tank immersion, but doesn't work well for heavy rust.
Mechanical abrasion (sandblasting or shot blasting): More aggressive approach that removes both rust and old coating. Suitable for heavy rust, but adds cost and dust control complexity. Often used offline for heavily corroded parts.
For aluminum and stainless steel, acid pickling is typically less necessary (these materials oxidize differently), but light acid treatment or specialized etchants can still improve conversion coating adhesion.
We typically recommend a combination approach for carbon steel cabinet parts: alkaline degreasing first, followed by mild acid wash to remove residual rust and oxide, then immediate rinsing and phosphating. This sequence is more reliable than trying to do everything in one step.
Chemical Conversion (Phosphating / Chromate-Free Treatment)
This is where the magic happens. After the surface is clean and bare, a chemical layer is deposited on the metal. This layer is microporous, anchors powder particles, and provides a barrier against corrosion.
Phosphating (zinc phosphate, most common) creates a thin crystalline phosphate coating through a chemical reaction between the part surface and phosphate solution. It's been the industry standard for decades, particularly for steel. The phosphate layer bonds mechanically with the base metal and provides excellent adhesion and corrosion protection.
Chromate-free conversion coatings (zirconium-based, titanium-based, or hybrid formulations) are increasingly used due to environmental regulations and customer preferences. These work similarly—they form a conversion layer that promotes adhesion and corrosion resistance—but without hexavalent chromium. We've used both types; the key is matching the chemistry to your application and local environmental rules.
For aluminum, chromate-free coatings or specialized aluminum conversion treatments are standard. Zinc phosphating doesn't work as well on aluminum as it does on steel, so aluminum lines typically use different chemistry.
For stainless steel, conversion coating may be optional (stainless is naturally more corrosion-resistant), but we often apply it anyway for adhesion consistency, especially in high-salt or high-humidity environments.
The conversion bath must be maintained carefully: pH, temperature, concentration, and bath age all affect film quality. We recommend daily concentration checks and monthly bath analysis for any line that runs regularly.

Rinsing and Drying
After phosphating or conversion coating, any residual chemical and salt deposits must be completely removed. This is where many shops cut corners, and where many coating failures originate.
Spray rinsing with clean, treated water removes loose salts and excess chemistry. Deionized or demineralized water final rinse ensures no dissolved minerals remain to interfere with coating.
Drying must be thorough. Residual water on the surface causes pinholing, blistering, and adhesion loss. We use either hot-air tunnels (70–100°C) or combined air blow-off plus low-temperature drying. The workpiece must be visibly dry and warm to the touch before entering the spray booth.
We emphasize this point strongly in our projects: rushing the drying stage is a primary source of coating defects. If a workpiece is even slightly damp when it reaches the spray booth, powder won't adhere uniformly, and the final coating will fail. This is non-negotiable.
How Pretreatment Scope Varies by Material Type
The complete pretreatment process we've outlined above is the "full protocol" suitable for carbon steel. However, different materials behave differently, so the emphasis and sequence can shift.
Steel and Iron Workpieces
Steel and iron are the most forgiving from a pretreatment perspective, but also the most vulnerable to corrosion, so they demand the most complete treatment.
Typical sequence for steel:
- Alkaline degreasing (1–2 minutes in spray or dip)
- Water rinse
- Mild acid wash or spray acid (to remove rust and oxide)
- Water rinse
- Zinc phosphate bath (2–5 minutes, typically 50–70°C)
- Deionized water rinse
- Final water rinse
- Hot-air drying (70–100°C, until visibly dry)
This is the "full eight-step" process we recommend and typically spec for cabinet and frame manufacturers. It addresses all contamination types and provides robust adhesion and corrosion barrier.
For heavily rusted or old stock, you might add a mechanical abrasion step (sandblasting) before chemical processing, but this is not routine for production parts.
Aluminum and Aluminum Alloys
Aluminum is softer and more reactive than steel. Acid pickling, if used at all, must be gentler. Conversion coatings for aluminum are typically zirconium-based, titanium-based, or chromate-free formulations rather than zinc phosphate.
Typical sequence for aluminum:
- Alkaline degreasing (same as steel)
- Water rinse
- Optional: mild alkaline etch or surface etch (not strong acid)
- Water rinse
- Zirconium or titanium conversion coating (or chromate-free alternative)
- Deionized water rinse
- Final water rinse
- Drying
The key difference is that aluminum doesn't need aggressive rust removal (it doesn't rust like steel), but it does need an etch or conversion chemistry specifically formulated for aluminum. Using steel-specific phosphate on aluminum will not give optimal results.
We've worked with several aluminum profile and extrusion manufacturers. The most common issue we see is shops using the wrong conversion chemistry—either borrowed from a steel operation or oversimplified. It saves a little cost upfront but leads to adhesion and durability problems. Aluminum deserves its own chemistry.
Stainless Steel
Stainless steel is the most chemically stable and least corrosion-prone, but also the hardest to achieve good adhesion on because its surface is naturally passive and unreactive.
Typical sequence for stainless:
- Alkaline degreasing
- Water rinse
- Optional: dilute acid etch or stainless-specific conversion treatment (mild)
- Water rinse
- Optional: specialized stainless conversion coating (if strict adhesion is required)
- Deionized water rinse
- Final water rinse
- Drying
For stainless, many shops skip the conversion coating altogether if the part will be used indoors or in non-corrosive environments. However, for outdoor stainless or high-adhesion requirements, we recommend at least a light conversion treatment.
The table below summarizes the key differences:
| Material | Degreasing | Rust/Oxide Removal | Conversion Chemistry | Drying Requirement |
|---|---|---|---|---|
| Steel | Alkaline (standard) | Acid wash (recommended) | Zinc phosphate | High (100°C+) |
| Aluminum | Alkaline (standard) | Mild etch optional | Zirconium/titanium | Standard (70–80°C) |
| Stainless | Alkaline (standard) | Minimal/specialized | Optional/specialized | Standard (70–80°C) |
Critical Control Points: When Pretreatment Falls Short
From our experience on real production lines, pretreatment failures don't usually come from catastrophic breakdowns—they come from small, cumulative lapses in monitoring and maintenance.
Incomplete degreasing is the first problem. If the alkaline bath is too dilute or too cool, oils don't emulsify fully. Parts exit the degreaser still slippery. When they hit the acid rinse or phosphate bath, those sections don't bond chemically. Result: adhesion loss in random patches, poor coverage, and field failures.
Inadequate rinsing is the second. If deionized water rinse is skipped or the rinse tank becomes contaminated, mineral salts remain on the surface. During drying, these salts crystallize and block adhesion. Powder doesn't stick. We've seen this cause entire batches to fail.
Insufficient drying is the third and most insidious. A workpiece that looks dry but is still slightly cool and damp will accept powder—at first. But that trapped moisture causes the powder film to blister during curing as the water evaporates and creates gas pockets. These blisters are often discovered only after the finished parts reach the customer.
Conversion bath degradation is the fourth. Phosphate or zirconium baths age, concentrate, and lose efficiency. If not monitored and refreshed, the conversion layer becomes thin, porous, or inconsistent. Coating adhesion drops gradually, so it's not obvious until field failures accumulate.
Temperature drift affects everything. A degreaser that cools below 50°C works much slower. A phosphate bath that warms above 75°C can precipitate and clog. A drying tunnel that underperforms leaves parts damp. Each deviation compounds.
The lesson we've learned repeatedly: pretreatment requires more attention to detail than spray or cure, but typically receives less. Most shops hire their most experienced person to manage the spray booth and their least experienced to oversee the wash line. It should be the opposite.
Cost, Space, and Resource Requirements for Pretreatment Systems
Pretreatment is not inexpensive to build and operate, and it takes up significant floor space. Understanding these constraints helps when designing a line.
Space: A complete eight-stage pretreatment line—even a compact one—requires roughly 8–15 meters of linear space (depending on part size and stage dwell times). If you're running a manual line where parts are hand-moved between tanks, add time for staging areas. If you're running a conveyor line, each tank or spray module occupies a dedicated zone.
Equipment: Typical components include degreasing tanks, rinse tanks, phosphate bath tank, conversion bath tank, hot-air dryer, chemical metering and monitoring systems, waste treatment (if required), and water treatment (if deionized rinse is specified). Budget for heating elements, pump systems, spray nozzles, and control instrumentation.
Water and chemical consumption: Pretreatment is resource-intensive. A large cabinet workpiece might consume 10–20 liters of process water and 2–5 kg of chemical per cycle across all stages. Over a month or year, this adds up. Water treatment (deionization or reverse osmosis for final rinse) adds cost and maintenance.
Energy: Heating degreasing and drying stages requires significant power. A spray-and-heat pretreatment line might draw 20–40 kW continuously, depending on ambient temperature and drying intensity.
Waste handling: Spent bath chemistry, contaminated rinse water, and phosphate sludge must be disposed of properly. Many jurisdictions regulate heavy metals (zinc, iron, phosphorus) in wastewater. Budget for treatment, testing, or third-party disposal.
From our cost experience, a fully integrated pretreatment system (degreasing, acid rinse, phosphate, rinse, drying) for a mid-size cabinet or profile line runs $50,000–150,000 USD depending on automation level and throughput. It's a significant capital commitment, but it's essential for reliable coating quality.
How to Assess and Verify Pretreatment Quality
You can't see pretreatment quality with your eyes once the powder is on. You have to verify it as the line runs.
Visual inspection of parts immediately after pretreatment is the first check. Parts should be visibly dry, uniformly colored, and free of water spots or residue. If you see white salt deposits or uneven coloration, chemistry or rinsing is failing.
pH testing of the final rinse water tells you if deionized rinsing is effective. Use pH paper or a meter. The rinse water should be neutral (pH 6–8). If it's acidic or basic, residual chemistry is still present.
Water conductivity (total dissolved solids) is more precise. Deionized rinse water should have conductivity below 20 µS/cm (microsiemens per centimeter). If it's higher, the rinse is not removing salts.
Adhesion testing on finished parts tells you the downstream impact. A cross-hatch adhesion test (ASTM D3359 or ISO 2409) is standard. If adhesion is poor even though spray and cure parameters are correct, pretreatment is the culprit.
Salt spray testing (ASTM B117 or equivalent) is the ultimate verification for corrosion protection. Parts coated from a well-treated batch should show no red rust after 500–1000 hours of salt-fog exposure. Poor pretreatment results in rust creeping under the coating in days or weeks.
Batch documentation from your conversion bath supplier includes target concentration, bath pH, and bath life. Measure these regularly (weekly minimum for active lines). Keep a log. When performance drifts, you'll have data to diagnose it.

We always recommend establishing a pretreatment SOP (standard operating procedure) and a maintenance schedule. Check degreaser concentration daily. Check phosphate bath chemistry twice a week. Verify drying temperature and dwell time on every shift. Refresh rinse water regularly. It sounds tedious, but these small acts of discipline prevent field failures that cost far more.
Pretreatment Configuration for Small-Batch and Multi-Material Production
Not every operation is a high-volume, single-material line. Smaller shops and contract manufacturers often juggle different workpiece types—steel one day, aluminum the next, stainless steel occasionally—each with different pretreatment needs.
This creates a dilemma: do you run multiple specialized pretreatment lines, or do you make one flexible line work?
From our perspective, the best approach is to establish a core pretreatment sequence that works for your primary material (usually steel), and then modify it slightly for secondary materials. For instance:
- Core sequence (optimized for steel): alkaline degreasing → acid rinse → zinc phosphate → drying.
- For aluminum parts: skip or reduce acid rinse, use zirconium conversion instead of phosphate.
- For stainless: skip acid entirely, use optional stainless-specific conversion.
This is possible if your rinse and bath tanks are large enough and your scheduling allows brief transition time between material types. You're not rebuilding the line; you're adjusting chemical solutions and bath residence times.
Fast color change systems in powder coating can be paired with fast material-type changeover in pretreatment. One customer we worked with was able to handle three different materials per day by keeping extra conversion baths ready and swapping chemical feed lines. It's more supervision work, but it's feasible.
Another option for true multi-material shops is to use broad-spectrum or universal pretreatment chemistry that works on multiple metals. These exist (some modern zirconium or hybrid coatings are quite universal), but they tend to be slightly more expensive and may not optimize for any single material. It's a trade-off between simplicity and performance.
For small-batch or job-shop environments, we recommend documenting a simple material-type matrix: what pretreatment route is used for steel, aluminum, and stainless. Before any batch runs, the operator confirms the material type and follows the corresponding protocol. It prevents accidents and ensures consistent results.
Why Pretreatment Is the True Foundation of Your Entire Coating Investment
Here's the reality we've observed across dozens of installations: a client might spend twice as much on a sophisticated spray booth and advanced control systems, but if pretreatment is weak, the final coating will be mediocre or fail. Conversely, we've seen older, simpler spray systems paired with rigorous pretreatment produce superior, long-lasting coatings.
The ROI on pretreatment isn't always obvious because the benefit is in what doesn't fail—you don't see adhesion loss, you don't get corrosion creep, you don't deal with warranty claims. But that absence of problems is where the real value lies.
This is why we always tell potential customers: before you spec the fanciest spray guns or the highest cure temperature, make sure your pretreatment strategy is sound. If you're uncertain, bring us in for a line audit. We'll review your current process, identify weak points, and recommend practical improvements—whether that's upgrading tanks, adjusting chemistry, or retraining your operators.
Pretreatment isn't glamorous. It doesn't impress people the way a new spray booth does. But it's where coating quality is genuinely made or broken. Respect it, invest in it, monitor it, and your coating line will deliver reliable, durable results for years to come.
Related Questions
Q: Can I skip pretreatment if I'm using a self-etching primer powder?
A: Not completely. Even self-etching powders work better on a clean, dry surface. We still recommend at minimum alkaline degreasing and thorough drying. Skipping pretreatment entirely will hurt adhesion and corrosion protection.
Q: How often should I replace my phosphate bath?
A: Depends on volume, but typically every 3–6 months for active lines. Track bath age and concentration. When you hit manufacturer limits on bath life or can't maintain target concentration with fresh chemistry alone, it's time to change.
Q: Is deionized water rinse really necessary?
A: For outdoor, high-corrosion, or high-adhesion applications, yes. It removes dissolved salts that would interfere with coating durability. For indoor, non-critical parts, standard tap-water rinse followed by thorough drying may be acceptable—but adhesion will be less consistent.
Q: Can I use the same pretreatment line for powder and liquid paint?
A: Mostly, but there are differences. Powder coating pretreatment emphasizes dryness; liquid paint pretreatment often tolerates slight dampness. If you're switching between the two, err on the side of extra drying.
Conclusion
Painting pretreatment is the first critical step in any powder coating process, and its scope—degreasing, rust removal, chemical conversion, rinsing, and drying—directly determines adhesion, corrosion resistance, and coating longevity.
From our experience with cabinet, furniture, and aluminum manufacturers around the world, we know that overlooking pretreatment leads to field failures that cost far more to remedy than getting pretreatment right the first time.
If you're planning a new coating line, upgrading an existing one, or troubleshooting adhesion or corrosion issues, pretreatment is where to start. Invest in the right chemistry, maintain it rigorously, and verify it regularly. The result will be coatings that last and customers who stay satisfied.
If you'd like to discuss your specific pretreatment challenges—whether it's material type, space constraints, throughput targets, or quality verification—we're here to help. Reach out to us at +8618925987762 or ketucoatingline@gmail.com. We'll walk through your requirements and recommend a practical solution tailored to your operation.
 English
  German
  Vietnamese
  French