
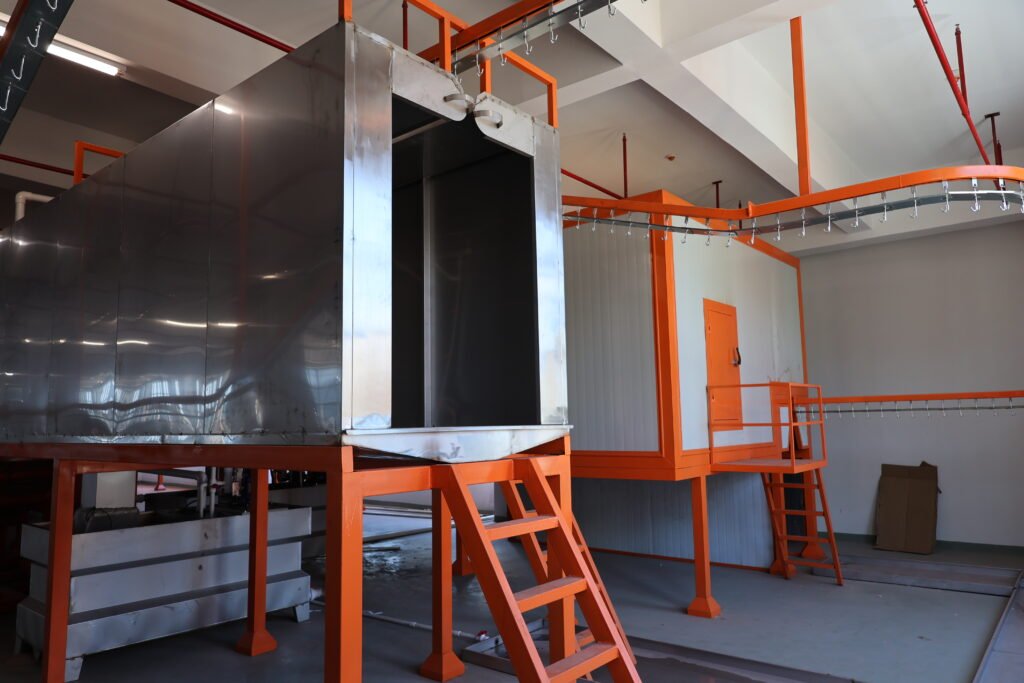
You're coating metal parts in bulk, but traditional liquid paint is messy, wasteful, and slow. Static electricity holds the answer—powder coating uses charged particles to create uniform, durable finishes in a fraction of the time. The process sounds simple on the surface, but understanding the five core stages is critical for getting quality results and avoiding costly defects.
Powder metal coating is a dry finishing process where charged powder particles are electrostatically attracted to a grounded metal surface, then cured under heat to form a protective, durable coating. The complete workflow involves pre-treatment, electrostatic spraying, powder curing, cooling, and quality inspection—each stage directly impacts the final coating quality, adhesion, and longevity.
Here's what you need to know to run this process reliably in your factory.
What is powder metal coating and why is it used?
Powder metal coating is fundamentally different from liquid paint. Instead of spraying wet paint that requires solvent evaporation, you're applying fine powder particles that stick to the metal through static electricity, then heat-fusing them into a solid film.
The core advantages matter at scale:
- No VOC emissions: Powder coating produces almost no volatile organic compounds, making it far more environmentally friendly than solvent-based paint.
- Higher transfer efficiency: 85–95% of powder adheres to the workpiece on the first pass. Overspray is recovered and reused, eliminating waste.
- Thicker, more uniform coating: You achieve consistent film thickness across complex shapes—edges, corners, internal angles—without drips or sags.
- Superior adhesion and durability: The chemical cross-linking during curing creates coatings that resist corrosion, impact, and wear far better than liquid paint.
- Faster production cycles: No wet spray time, no solvent dry-down. Once cured, parts are ready to handle immediately.
- Lower operating costs: Less material waste, lower energy consumption per part, reduced labor for spray setup and cleanup.

This is why powder coating dominates in cabinet manufacturing, furniture production, aluminum extrusion, and metal fabrication. If you need consistent, high-quality surface finishes at scale, powder coating is the industrial standard.
The five main stages of powder metal coating process
Pre-treatment: Foundation for coating quality
This is where 70% of real-world coating failures originate. If pre-treatment is poor, no amount of spray parameter adjustment will save you.
The pre-treatment stage removes contaminants and prepares the metal surface for optimal powder adhesion:
Degreasing: Oil, cutting fluid, fingerprints, and shop dust must go. Alkaline degreasing solutions use spraying or immersion to strip these off. If you skip this, powder won't stick.
Rust removal and surface preparation: For steel, acid pickling or mechanical methods (sandblasting, shot peening) remove oxide layers and mill scale. For aluminum, mild acidic treatment removes corrosion. This step also increases surface roughness, which helps powder grip the metal.
Phosphate or conversion film application: A critical step. For steel parts, phosphate conversion coating creates a microscopic crystalline layer that dramatically improves adhesion and corrosion resistance. For aluminum, non-chromium conversion films (zirconium or titanium-based) provide the same benefit while meeting modern environmental standards.
Rinsing and drying: Residual salts, phosphate sludge, and moisture must be completely removed. Any water left on the surface will cause pinholes, craters, and poor adhesion during curing. We use pure water rinses followed by hot-air drying in our lines—this is non-negotiable.
Why pre-treatment dominates coating quality: When coating fails in the field—blistering, adhesion loss, corrosion creep—the root cause is almost always inadequate pre-treatment, not poor spray or curing. In our experience working with cabinet manufacturers and aluminum fabricators, this is the single biggest difference between premium coatings and field failures.
Electrostatic powder application: Core technology
This is where the powder actually adheres to the workpiece. The physics is simple; the execution demands precision.
How it works: The spray gun contains a high-voltage electrode that charges powder particles as they exit the nozzle. Typical gun voltage ranges from 60–90 kV. The metal workpiece is grounded, creating an electric field. Charged powder particles are attracted across this field and stick to the metal surface.
Two spray gun types dominate industry practice:
- Corona guns: Electrons jump from the electrode to air, ionizing air molecules that then charge the powder. Universal application, works well for 90% of parts.
- Triboelectric guns: Powder charges through friction as it passes through the gun body. Better for complex shapes and Faraday cage effects (deep holes, internal angles), but more sensitive to powder formulation and humidity.
Critical spray parameters:
Grounding quality is absolutely fundamental. Poor contact between the workpiece and ground means powder won't adhere consistently. Edge accumulation, uneven film thickness, and even complete spray-offs are symptoms of grounding failure. Check all hanging points, clamps, and workpiece contact surfaces for oil, oxidation, or powder buildup.
Gun distance (typically 150–300 mm from the workpiece) directly impacts transfer efficiency and coating uniformity. Too close, and you overspray edges and risk backoff (powder bouncing away from the surface). Too far, and you lose transfer efficiency—powder drifts away, parts of the workpiece stay bare, and you waste material.
Voltage and current are interdependent. Higher voltage pulls powder across the field faster but risks hitting too hard and bouncing off. Higher current (above 20 μA) can cause localized overspray and edge buildup. Start with recommended settings from your powder supplier, then adjust based on your specific part geometry.
Spray pattern and gun angle matter for complex shapes. Parts with internal angles, recessed areas, or deep slots create "Faraday cage" effects where the electric field lines don't penetrate easily. Your spray operator (or automated gun routine) must angle guns to redirect the field into these dead zones.
From our factory experience: Most spray defects—uneven coverage, thin spots, thick edges—come from operator habit or automated gun programming that doesn't match the actual part geometry. We always recommend on-site calibration with your actual production parts before committing to a full production line.
Powder curing in the oven: Chemical bonding
Curing is not "drying"—it's a chemical reaction. The powder doesn't just harden; the resin and hardener molecules cross-link, creating a continuous, permanent film.
The curing process in three stages:
- Fusion: Powder reaches its melt point (typically 170–200°C). Particles flow together, filling surface gaps and leveling the coating.
- Flow and leveling: The molten powder spreads across the metal, reducing orange-peel texture and creating a smoother surface.
- Cross-linking: Chemical bonds form between resin molecules. This is irreversible and creates the final hardness, adhesion, and chemical resistance.

Temperature and time control:
The target isn't just air temperature in the oven—it's the actual metal surface temperature. Thick steel workpieces heat slowly from the outside in. If your oven is programmed to 200°C but the steel surface only reaches 180°C, cross-linking is incomplete, and the coating will be soft, poorly adhered, and weak against corrosion.
Typical cure schedules for common powders:
- Epoxy: 10–20 minutes at 180–200°C
- Polyester: 10–15 minutes at 200–220°C
- Hybrid epoxy-polyester: 10–15 minutes at 190–210°C
Undercuring (insufficient temperature or time) produces soft coatings, poor adhesion, weak solvent resistance, and early corrosion.
Overcuring (too hot, too long) darkens the coating, reduces gloss, can increase brittleness, and may degrade some powder chemistries.
From our factory perspective: The most common production mistake we see is linear conveyor speeds that don't account for part mass and material. A thick aluminum cabinet frame and a thin sheet metal bracket require different residence times in the cure oven. Programmable ovens with zone temperature control let you adjust heating precisely to match your actual production mix.
Cooling and quality inspection: Final steps
After the cure oven, parts must cool to a safe handling temperature (typically below 60°C) before downstream operations like assembly or packaging.
Cooling methods:
- Passive (air): Parts cool naturally as they move along the conveyor. Slowest, but requires no equipment.
- Active (forced air): Fans accelerate cooling. Reduces cycle time, essential for high-volume lines.
- Water mist (rare in powder): Used only for specific applications; carries risk of moisture absorption if not perfectly controlled.
Quality inspection at this stage catches defects before parts reach the customer:
- Visual inspection: Gloss, color uniformity, absence of drips, sags, or imperfections.
- Film thickness: Use an electronic coating thickness gauge (non-destructive). Target film thickness is usually 50–100 microns, depending on application.
- Adhesion testing: Cross-hatch adhesion tests or tape tests verify coating bonding to the substrate.
- Hardness: Pencil hardness or micro-hardness testing confirm cross-linking completeness.
- Salt spray testing: For high-corrosion-risk products (cabinet hardware, outdoor furniture), ASTM B117 salt spray (typically 500–1000 hours) validates long-term protection.
Why final inspection matters: A single defective batch reaching customers creates warranty claims, field failures, and brand damage. We recommend 100% visual inspection on critical parts and statistical sampling (5–10%) on standard runs.
How does static electricity ensure uniform coating on metal?
The secret to powder coating's uniformity is electrostatic attraction—not mechanical spraying force.
The electrostatic principle: The powder gun creates an electric field. Powder particles acquire a negative charge (60–90 kV). The grounded workpiece acts as an attractor. Particles are pulled across the air gap and deposited on the surface.
Why this produces uniform coatings:
-
Particles are attracted, not thrown: Unlike liquid spray, which relies on air pressure and gun motion, electrostatic powder is pulled magnetically to the metal. This means even slow-moving or stationary particles reach the surface.
-
Field lines wrap around edges and corners: The electric field concentrates around sharp edges and points, actually pulling more powder to these high-risk areas. This is called "edge attraction," and it's why powder coating naturally produces thicker film on edges (which is often desirable for corrosion protection).
-
Recirculation of overspray: Powder that misses the workpiece is collected by the booth recovery system, sifted, and recirculated. This means every milligram of powder gets multiple chances to land on a part. Recovery rates of 90%+ are routine.
-
Uniform film across complex geometry: Because particles are attracted electromagnetically, not forced by air, they naturally conform to the part shape. Recesses, holes, and thin sections all receive consistent coating without operator skill variation.
The Faraday cage challenge: Complex internal shapes (deep cavities, recessed areas, tightly spaced components) can shield the electric field, creating "dead zones" where powder doesn't deposit. Solutions include:
- Lowering the spray gun voltage (reduces field strength but increases particle movement time).
- Using multiple spray guns at different angles to crossfire deep areas.
- Reorienting the workpiece during spray to expose all surfaces.
- Selecting a triboelectric gun, which doesn't rely on field lines as heavily.
From factory practice: We've found that automated spray routines programmed for one part geometry often fail when a customer introduces a slightly different design. A 20 mm cavity instead of 10 mm can completely change where the field concentrates. Always validate your spray program with actual production samples before committing to high-volume runs.
Critical factors that affect coating quality and durability
Pre-treatment adequacy and surface preparation
We cannot overstate this: Pre-treatment quality is the foundation. Poor pre-treatment produces:
- Adhesion loss and peeling (often appearing weeks or months after coating).
- Corrosion creep under the coating (water and oxygen seeping under poor adhesion).
- Blistering and crater formation (residual moisture or contamination outgassing during cure).
- Salt spray failure (ASTM B117 corrosion testing reveals inadequate conversion film).
Actionable checks:
- Verify phosphate/conversion film thickness (typically 1–3 microns). Use X-ray fluorescence (XRF) or chemistry kits to measure.
- Test water spotting: Pure water applied to freshly pre-treated steel should bead and dry without white residue. Residue indicates incomplete rinsing.
- Monitor drying temperatures: Pre-treated parts must reach 70–100°C in the drying oven to eliminate ALL moisture before spray.
Powder spray parameters and equipment settings
Spray variables directly under your control:
- Spray gun voltage: Start at 70 kV, adjust ±10 kV based on transfer efficiency and edge quality.
- Spray gun current: Maintain 10–15 μA for most applications. Above 20 μA risks edge overspray.
- Gun distance: 200 mm is a safe start; adjust ±50 mm based on part geometry.
- Supply powder consistency: Batch-to-batch powder variation (particle size, flow rate, electrostatic properties) can degrade transfer efficiency by 5–10%. Rotate stock, use fresh powder.
- Humidity control: Powder absorbs moisture in humid environments (>65% RH), reducing charge retention and adhesion. Use desiccant drying in powder storage.
From our line experience: Inconsistent spray quality often traces to drift in powder supply system rather than spray gun failure. Powder pumps wear, air pressure fluctuates, and supply lines accumulate residue. Monthly cleaning and quarterly pump inspection prevent 80% of spray-related defects.
Oven temperature, time, and cooling conditions
Temperature uniformity inside the oven is critical. Poor thermal distribution produces:
-
Undercured zones (soft, poor adhesion).
-
Overcured zones (darkened, brittle coating).
-
Color variation across the same batch.

Best practices: -
Install multiple temperature probes (minimum 5–7 points) inside the oven to map temperature distribution.
-
Use a calibration workpiece (a dummy metal panel) to measure actual surface temperature during a cure cycle. This reveals the real cure profile.
-
Program zone heating (separate heating sections with independent control) to manage large or thermally complex workpieces.
-
Maintain oven insulation and door seals. Heat loss = energy waste + temperature swings.
Conveyor speed synchronization: Your overall line throughput depends on cure time. If the conveyor is too fast, parts spend insufficient time in the hot zone. If too slow, you waste capacity and energy. Synchronize conveyor speed to your actual cure requirement—not the other way around.
Powder coating vs. traditional liquid coating: Why choose powder?
Liquid spray (solvent-based or waterborne):
- VOC emissions (30–50% of spray is solvent that evaporates).
- Lower transfer efficiency (50–70%; much overspray waste).
- Longer dry time (4–24 hours before handling).
- Thinner, less consistent film.
- More operator-dependent; spray technique varies results.
- Higher labor and waste disposal costs.
Powder coating:
- Zero VOC (all powder recirculates or filters out).
- 85–95% transfer efficiency; minimal waste.
- Ready to handle in minutes (after cure).
- Uniform, repeatable film thickness.
- Consistent results across different operators; process is parameter-driven.
- Lower total cost of ownership at scale (200+ parts per day).
When powder coating makes financial sense:
- Production volume: 50+ parts per day; the efficiency advantage compounds.
- Batch consistency: Multiple color changes; powder's quick changeover (minutes vs. hours for liquid) saves time.
- Corrosion requirement: Industries with high salt-spray or humidity demands (outdoor furniture, coastal installations, marine gear).
- Complex geometry: Recesses, internal angles, thin sections where liquid spray struggles; powder's electrostatic attraction excels.
When liquid coating still makes sense:
- Very low volume (1–10 parts per day); setup complexity doesn't justify powder.
- Thick film coatings (200+ microns); liquid spray can build thicker in fewer passes.
- Texture finishes (hammered, wrinkled effects); easier with specialized liquid formulations.
From our factory's perspective, if you're producing more than 100 metal parts per week and consistency matters, powder coating is not optional—it's the foundation of competitive quality.
Equipment, space, and environmental requirements for powder coating operations
Minimum equipment suite:
- Pre-treatment line: Spray wash, rinse, dry stages. Footprint: 10–15 meters linear.
- Spray booth: Enclosed chamber with filters, recovery system, exhaust fans. Footprint: 5–10 square meters.
- Curing oven: Insulated chamber with heating system (electric or gas). Footprint: 5–15 linear meters, depending on cure time and conveyor speed.
- Conveyor system: Hangers, chain drive, or motorized belt. Footprint: dedicated run connecting all stages.
- Powder supply system: Hopper, pump, feed lines, spray guns. Footprint: equipment room, ~5 square meters.
- Recovery/recycling system: Cyclone separator or bag filter. Footprint: external mounted or roof-mounted.
- Compressed air system: 6–10 bar, 50–100 CFM minimum. Footprint: separate compressor room.
Space and facility checklist:
- Ceiling height: 3 meters minimum for booth, 2.5+ meters for oven access.
- Floor load capacity: Pre-treatment tanks (water, chemicals) weigh 500–2000 kg. Oven structure weighs 2000–5000 kg. Verify floor can support 2–3 metric tons.
- Electrical: 3-phase 380V or 400V standard for industrial lines. 30–100 kW depending on oven and equipment sizing.
- Natural gas or propane (if using gas curing oven): 5–20 kW heat output; requires gas connection and flue venting.
- Compressed air: 6–10 bar, 50–100 CFM. Install dryer and filters to ensure powder quality.
- Water supply: 20–50 liters per hour for pre-treatment rinses. Quality matters: hard water requires softening to prevent scale.
- Drainage: Pre-treatment wastewater requires treatment (phosphate removal, pH neutralization) before discharge or recycling.
- Ventilation and air quality: Exhaust fans must move 1000–2000 CFM to keep booth negative pressure and prevent powder dust escape. Install HEPA filters on final exhaust.
- Dust control: Powder booth recovery system should achieve 90%+ dust capture. Remaining airborne particles require bag filters or electrostatic precipitators.
Environmental compliance:
- VOC limits: Powder coating is inherently compliant; zero solvent emissions.
- Dust emissions: Most regions limit particulate discharge to <10 mg/m³. HEPA filtration achieves this.
- Wastewater: Pre-treatment chemistry (phosphate, iron) must be settled and treated. Many facilities recycle phosphate bath water; disposal requires licensed waste contractor.
From our factory operations: Most first-time buyers underestimate the complexity of pre-treatment wastewater and compressed air quality. Poor air (water, oil, particulates) destroys powder quality and spray reliability within months. Invest upfront in a proper drying and filtration system—it pays back in coating consistency and downtime avoidance.
Common challenges in powder coating and how to prevent them
Orange peel texture: Coating surface looks bumpy, like an orange skin.
- Cause: Powder too thick, poor flow during cure, high oven temperature overheat.
- Prevention: Reduce single-pass film thickness to <100 microns; verify oven temperature is within ±5°C of target; allow 5–10 minutes soak time at peak temperature for proper leveling.
Pinholes and craters: Tiny holes throughout the coating.
- Cause: Residual moisture on pre-treated surface, outgassing during cure, powder contamination.
- Prevention: Increase drying oven temperature to 80–100°C; verify pre-treatment completion; use fresh powder and check storage conditions.
Poor adhesion and peeling: Coating comes off under tape test or mechanical stress.
- Cause: Inadequate pre-treatment (no conversion film, incomplete degreasing), undercuring, surface contamination after pre-treatment.
- Prevention: Mandate pre-treatment verification (phosphate film thickness, water spotting test); increase cure temperature by 5–10°C; reduce delay between pre-treatment and spray (within 4 hours minimum).
Color variation batch-to-batch: Same powder formula appears different shade across production runs.
- Cause: Oven temperature drift, different film thickness, powder aging or UV degradation.
- Prevention: Calibrate oven monthly; control film thickness within ±10%; store powder in cool, dark, sealed conditions; rotate old stock.
Edge buildup and thick spots: Coating accumulates on sharp edges, creating thick, rough areas.
- Cause: Normal Faraday cage field concentration; exacerbated by high spray voltage or close gun distance.
- Prevention: Reduce spray voltage by 10 kV; increase gun distance by 50 mm; use multi-gun crossfire for edges; soft-edge the workpiece design if possible.

Uneven coverage and bare spots: Parts of the workpiece miss powder entirely. - Cause: Grounding failure, Faraday cage effect (internal cavities), spray gun angle mismatch, low powder supply.
- Prevention: Check all grounding contacts and clean before each shift; use angled guns to penetrate cavities; verify spray pressure and supply consistency; validate spray routine with actual parts.
Low powder transfer efficiency (>10% overspray): Excessive powder waste, poor economics.
- Cause: Incorrect voltage or distance, low powder supply pressure, low humidity (powder loses charge).
- Prevention: Calibrate spray parameters for your specific booth geometry; increase humidity to 40–50% RH if <35%; check and maintain powder pump.
Oven temperature swings: Temperature fluctuates by >10°C during production.
- Cause: Poor insulation, thermostat lag, oversized heating system, high volume production without staging.
- Prevention: Inspect and repair oven door seals; upgrade to zone control thermostats; size heating capacity to match conveyor load; batch small/large parts separately.
More related questions
How is the powder coating process done in a factory setting?
In practice, a full production line sequences workpieces through pre-treatment (degreasing, rinsing, phosphating, drying), spray booth (electrostatic powder application, 1–3 passes), oven cure (170–220°C, 10–20 minutes), cooling, and final inspection. Automated conveyors synchronize timing; operator skill is minimal because the process is parameter-driven, not hand-controlled.
What is the process of powder coating oven curing?
Curing is a three-stage chemical reaction: (1) powder particles melt and fuse together at 170–200°C, (2) the molten coating flows and levels across the metal surface, (3) resin molecules cross-link chemically, creating permanent hardness and adhesion. The entire reaction takes 10–20 minutes depending on powder chemistry and film thickness.
What does powder coating do for metal?
Powder coating provides four core benefits: (1) Superior corrosion protection (epoxy and polyester powders resist salt spray, moisture, and chemicals), (2) Enhanced aesthetics (uniform gloss, color consistency, smooth finish), (3) Impact and wear resistance (harder than liquid paint due to cross-linked chemistry), (4) Durability (10–20+ year lifespan in indoor/outdoor applications).
Why should I choose powder coating over liquid paint?
Powder coating wins on three fronts: efficiency (85–95% transfer vs. 50–70% liquid), consistency (parameter-driven process vs. operator-dependent spray), and economics (lower waste, faster throughput, higher part volume justified). At volumes >100 parts/week, powder coating typically costs 20–40% less per part while delivering superior quality.
 English
  German
  Vietnamese
  French