
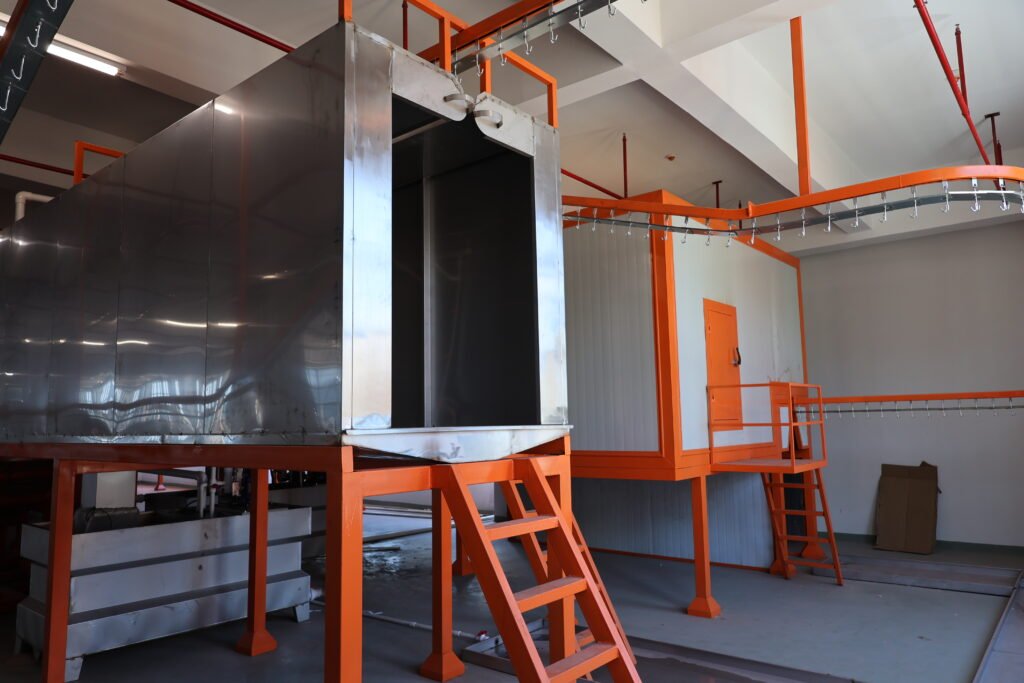
Steps and Considerations for Manual Powder Coating: A Complete Operational Guide
Manual powder coating remains one of the most practical and flexible methods for applying electrostatic powder finishes to metal parts. While automated lines offer consistent high-volume production, hand-spray operations deliver precision control, adaptability to complex geometries, and cost-efficiency for small to medium batches. However, achieving quality results requires discipline across every step—from surface preparation through curing—and a clear understanding of the critical parameters that determine success.
Manual powder coating requires careful attention to surface preparation, spray technique, and curing conditions to achieve uniform coverage and strong adhesion. Key steps include pre-treating the workpiece to remove contaminants, ensuring proper grounding, maintaining consistent spray gun distance and angle (typically 150-300mm), controlling voltage and air pressure, and allowing adequate curing time in a heated environment. Common issues such as uneven film thickness, pinholes, and poor adhesion typically stem from inadequate pre-treatment, unstable spray technique, or insufficient curing temperature—all preventable with operator training and process discipline. Manual application works well for small batches or complex geometries but requires experienced personnel and careful workpiece handling to match the consistency of automated systems.
From our experience working with manufacturers in cabinet making, furniture production, and metal component fabrication, we've learned that manual spray operations succeed or fail based on fundamentals—and most failures trace back to the early stages, not to the spray gun itself.
What Is Manual Powder Coating and Why Does Surface Preparation Matter Most
Manual powder coating is the process of hand-applying electrostatic powder through a spray gun directly onto grounded workpieces. The operator controls the spray pattern, distance, speed, and coverage, allowing real-time adjustment to part geometry and finish requirements. Unlike automated systems that follow fixed programs, manual spraying adapts instantly to different product shapes, sizes, and surface conditions.
The workpiece receives electrical charge through grounding, and the charged powder particles adhere to the surface through electrostatic attraction. Once coating is complete, the part enters a heated curing oven where powder melts, flows level, and undergoes chemical cross-linking to form a durable, protective finish.
Surface preparation is the foundation of manual powder coating quality. We consistently observe in the field that over 70% of surface defects originate from inadequate pre-treatment, not from spraying technique. If oil, rust, moisture, or chemical residues remain on the workpiece surface, no amount of spray adjustment will produce acceptable results. Pre-treatment removes contaminants, creates a micro-rough surface texture that anchors powder particles mechanically, and establishes a chemical conversion layer that improves adhesion and corrosion resistance.
Skipping or rushing pre-treatment creates a false economy. A workpiece that looks "clean enough" under shop lighting may still harbor microscopic oil films, salt deposits, or oxidation that will cause coating failure weeks or months later in service. This is why we recommend treating surface preparation as the first quality checkpoint, not as an afterthought.

Complete Step-by-Step Process for Manual Powder Coating Operations
Pre-treatment and Surface Preparation
Surface preparation typically involves five sequential stages: degreasing, rinsing, rust removal or pickling, a conversion coating process, and drying.
Degreasing removes oils, cutting fluids, and organic contaminants. Alkaline degreasing solutions work well for most steel and aluminum parts. The workpiece is sprayed or immersed, allowing chemical action to penetrate and break down oils, then rinsed thoroughly with clean water to remove all residual degreaser. Incomplete degreasing is one of the most common oversights we encounter—operators often assume a quick spray is sufficient, but heavy oil or old cutting fluid requires time and agitation to lift away completely.
Intermediate rinsing removes degreaser residue. Any remaining alkaline solution will interfere with the conversion coating and trap moisture in the substrate.
Rust removal or pickling is essential for any steel part with oxidation or mill scale. Acid-based pickling solutions dissolve rust and surface oxides. For heavily rusted parts, mechanical methods like abrasive blasting or wire brushing may be necessary first. The goal is bare, active metal surface.
Conversion coating (phosphate on steel, chromium-free treatments on aluminum) creates a microscopically rough, chemically prepared surface layer. This layer improves powder adhesion, enhances corrosion resistance, and provides a stable base for long-term durability. This step is not optional for outdoor products or parts facing moisture exposure.
Final drying is critical. Any water remaining on the surface after pre-treatment will be trapped beneath the powder film, causing pinholes, bubbles, or weak adhesion. Hot-air drying, or sometimes passing the part through a low-temperature oven, ensures complete moisture removal before the workpiece reaches the spray booth.
Workpiece Grounding and Electrical Setup
Proper grounding is essential for electrostatic powder adhesion. The workpiece must establish reliable electrical contact with the spray booth ground to receive and hold electrostatic charge. Without it, powder particles will bounce off, adhere poorly, or collect unevenly.
Grounding contact points must be clean, uncontaminated, and physically stable. Common contact points include hooks, clamps, or contact fingers. If these surfaces are covered in rust, powder residue, or old coating, electrical resistance increases dramatically, reducing charging efficiency.
We recommend establishing a routine grounding check: measure electrical resistance between the workpiece and ground. Resistance should be below 1 megohm (MΩ) for optimal performance. Resistance above 10 MΩ indicates poor contact and will cause visible spray problems—thinner film, missed spots, or inconsistent color.
Hanging fixtures must also be conductive and well-grounded. If a fixture is plastic-coated, painted, or heavily oxidized, it insulates the part from ground even if the part itself touches metal. We've seen operations waste hours troubleshooting spray patterns when the real problem was non-conductive or corroded fixtures.
Establish a pre-shift grounding checklist: inspect all contact points, clean away any powder residue or oxidation, and verify continuity with a simple continuity tester.

Spray Gun Operation and Coating Application
Manual spray technique directly affects film thickness uniformity, color consistency, and surface appearance. The operator controls three primary variables: distance from the workpiece, angle of approach, and hand speed.
Distance (typically 150–250mm) influences both film thickness and coverage efficiency. Too close causes powder to hit and bounce off ("flack"), creating bare spots and edge buildup. Too far reduces transfer efficiency and increases powder waste. The optimal distance depends on spray gun type, voltage setting, and powder properties—operators should receive training specific to their equipment and adjust based on visual feedback during the first few parts of a batch.
Angle should be perpendicular to the surface where possible, but complex geometries require careful positioning to reach recesses, corners, and internal features. For concave areas or deep slots (classic "Faraday cage" geometry problems), lower voltage, reduce powder flow, and approach from multiple angles to improve coverage.
Hand speed must remain steady and consistent. Slow passes build thicker film; fast passes create thinner coverage. Rushing through a spray pass is a common cause of missed spots and uneven color. A systematic pattern—left to right, overlapping by roughly 50% on each pass—ensures complete coverage without excessive buildup.
Multi-pass technique works well for complex parts. A light first pass establishes base coverage; subsequent passes add thickness and fill problem areas. This approach is more forgiving than trying to achieve full thickness in a single pass.
Once coverage is complete, allow the workpiece to sit briefly in the booth or a dedicated dwell area before moving to the curing oven. This brief hold allows powder particles to settle and consolidate, reducing the risk of powder shifting or falling during the transfer.
Curing and Quality Verification
Powder curing is not simply "drying"—it is a chemical process where powder particles melt, flow level, and undergo cross-linking reactions that create the final protective coating. Temperature control is critical.
Curing temperature varies by powder type but typically ranges from 170°C to 220°C (340°F to 430°F). The equipment manufacturer will specify the required temperature and time. Critical detail: it is the workpiece temperature, not the oven air temperature, that determines curing success. A large steel cabinet cools the ambient air as it enters a hot oven, so the part may lag significantly behind nominal oven temperature.
Curing time consists of two components: time to reach the target temperature plus "hold time" for chemical reactions to complete. Thin parts heat quickly; thick or complex assemblies require longer. A thermal profile showing workpiece internal temperature over time is the most reliable way to confirm adequate curing.
Under-curing results in soft coating, poor hardness, weak adhesion, and low corrosion resistance. Over-curing (excessive temperature or time) can yellow the coating, reduce gloss, embrittle the finish, or even degrade the coating matrix on some powder formulations. Stay within the manufacturer's specification window.
Quality verification occurs after cooling. Inspect for external defects, measure film thickness with a dry-film gauge, perform adhesion testing (cross-hatch or pull-off tests if required), and assess color consistency. Any part showing significant defects or dimensional out-of-spec thickness should be flagged for rework or scrap evaluation before shipment.
Critical Parameters to Control for Consistent Manual Spray Results
Spray Gun Distance, Angle, and Speed Settings
Consistency in these three variables is the difference between predictable quality and frustrating variance. We recommend treating them not as "feel-based" adjustments but as measurable process parameters documented for each product family.
Distance measurement can be as simple as marking a reference point on the spray gun (a tape marker on the nozzle) and maintaining that mark at a fixed distance from test parts during the first spray run of each shift. Operators with experience develop good hand feel, but new team members benefit from physical reference points.
Angle consistency is trickier on complex parts but critical nonetheless. For parts with flat faces, aim the gun perpendicular to each surface. For recessed features or edges, document the optimal approach angle and remind operators during training sessions. Taking a photo of good spray coverage from each key angle is sometimes more effective than verbal instruction alone.
Hand speed should be smooth and even. Nervous or jerky movements cause uneven thickness. A simple walking pace applied to the hand motion (not the entire body) works for most operators. Timing a reference part and noting the seconds required for full coverage helps establish a baseline; subsequent parts should take approximately the same time.
Compressed Air Quality and Powder Flow Rate
Compressed air contaminants—moisture, oil, and particulates—are among the most common causes of spray anomalies. Air compressors naturally accumulate water vapor from atmosphere humidity. If this moisture reaches the spray gun, it carries into the powder stream and causes defects like pinholes, sputtering, and inconsistent application.
Air dryer and filtration are mandatory, not optional. Install a refrigeration dryer upstream of the spray booth and maintain coalescent filters. Drain compressed air tanks and filter bowls daily. Check filter elements every week; replace when pressure drop increases visibly.
Powder flow rate is controlled by the powder feeder unit, typically a vibrating hopper or pump system that meters powder into the air stream at the gun inlet. Too little powder creates thin, porous coverage; too much causes buildup and waste. The feeder should be adjusted so that powder flows smoothly and continuously, but not so aggressively that the air stream cannot suspend particles evenly. Most equipment includes a visual flow indicator or a "listen test"—a healthy powder feed produces a consistent soft rustle.
Voltage, Grounding Resistance, and Electrical Continuity
Spray gun voltage determines electrostatic charging intensity. Higher voltage improves transfer efficiency but risks overspray bounce-back and edge accumulation. Lower voltage reduces these problems but may under-charge powder. Typical operating range is 60–80 kV, but the exact setpoint depends on part geometry, powder type, and application.
We recommend establishing a "first-article spray" protocol: for each new product, spray an initial test part while varying voltage in 5 kV increments (75 kV, 70 kV, 80 kV), then select the voltage that produces the most uniform, defect-free finish. Document this setpoint and apply it consistently to production batches.
Grounding resistance must be verified weekly or whenever equipment is moved or serviced. Use a simple digital resistance meter to check continuity from the workpiece hook to the spray booth ground. Target resistance below 1 MΩ; above 10 MΩ indicates poor contact requiring investigation.
Electrical continuity extends beyond the workpiece to include fixtures, conveyors, and booth infrastructure. Any break in the conductive path—corrosion at a bolt, a plastic spacer, a non-conductive coating—will degrade spray performance. A thorough preventive maintenance program checks these connections monthly.
Common Defects in Manual Powder Coating and How to Prevent Them
Orange Peel, Pinhole, and Uneven Film Thickness
Orange peel (a dimpled, uneven surface texture) usually results from either powder that flows poorly during curing or excessively thick film that doesn't level properly. It can also indicate a curing curve that heats too rapidly, trapping volatiles in the film matrix. Prevention: verify powder flow properties with the manufacturer, avoid excessive single-pass buildup (use multi-pass technique instead), and confirm that curing temperature is reached gradually, not suddenly.
Pinholes (tiny holes in the coating surface) emerge when trapped moisture or volatiles escape during curing. They are a direct sign of inadequate drying after pre-treatment or contaminated compressed air. Prevention: extend the drying step after rinsing, install and maintain air dryers and filters, and periodically drain compressor condensate.
Uneven film thickness occurs when spray distance, angle, or hand speed varies across the part surface. In manual operations, this is surprisingly common because operator fatigue or inattention causes drift. Prevention: establish consistent workpiece geometry and fixturing so distances are predictable, use reference marks on the spray gun as distance guides, and train operators to maintain steady hand speed and posture throughout each coating cycle.
Missed Spots, Poor Adhesion, and Coating Gaps
Missed spots (areas with no or minimal powder) arise from grounding problems, inadequate spray angle coverage, operator hesitation, or Faraday cage geometry in recesses. The first diagnostic step is always to check grounding resistance; if it's above 5 MΩ, poor adhesion and missing coverage are expected. If grounding is good, review the spray pattern. For deep recesses or internal edges, approach from multiple angles and accept that manual coverage of severe geometry challenges may require lower voltage to reduce bounce-back and increase transfer efficiency.
Poor adhesion (powder that flakes or peels after curing) indicates either surface contamination, inadequate pre-treatment, or under-curing. We strongly recommend requiring a simple adhesion test: cross-hatch the cured film with a razor or adhesion test tool and apply tape. If powder flakes away, the root cause is usually pre-treatment (residual oil, salt, or incomplete rinsing) rather than spray technique. Once pre-treatment is confirmed solid, check curing temperature with a thermal profiler to ensure the workpiece reaches target temperature for the full hold time.
Coating gaps at edges, corners, or transition lines occur because operators instinctively avoid these areas (worried about over-spray) or because geometry creates shadow zones. Prevention: consciously approach edges head-on, use lower voltage for better edge coverage, and inspect first articles closely, marking any problem areas for special attention in production runs.
Root Cause Analysis and Corrective Actions
When defects appear, we recommend following this diagnostic sequence: first, stop and inspect the part carefully, noting which defects are present and where they concentrate. Second, verify grounding—measure resistance immediately. Third, check compressed air quality—drain tanks, inspect filters, and listen for moisture hissing at the gun nozzle. Fourth, review pre-treatment—if any step was rushed or skipped, that is your culprit. Fifth, confirm curing temperature—place a temperature indicator or thermal profiler inside the oven.
Only after these fundamentals check out should you adjust spray gun parameters. Most defects we encounter in the field resolve with better pre-treatment discipline or confirmed grounding, not with fiddling with voltage or distance.
Quality Inspection Standards and Acceptance Criteria for Manual Applications
| Inspection Parameter | Acceptance Criteria | Measurement Method |
|---|---|---|
| Visual Appearance | No sags, runs, bubbles, or bare spots visible to the naked eye | Inspect under natural light at arm's length |
| Film Thickness | Per specification (typically 40–80 µm for powder) | Dry-film gauge (electronic or mechanical) |
| Adhesion | Pass ASTM D3359 (tape test) or equivalent cross-hatch test | Apply tape to cross-hatched film; peel and assess |
| Color Match | Within acceptable tolerance of reference panel | Compare under standard lighting with reference part |
| Gloss Level | Per specification (matte, satin, or gloss) | Gloss meter (60° standard) if required |
| Impact Resistance | No cracking or adhesion loss after forward/reverse impact | Drop-weight tester per ASTM D2794 |
| Hardness | Per specification (typically Pencil H–2H for powder) | Pencil hardness test per ASTM D3363 |
| Salt Spray (Corrosion) | No creepage or red rust beyond scribed line | ASTM B117 (200 or 500 hours depending on requirement) |
At a minimum, every batch should include full visual inspection and film thickness measurement. For new products or customer requirements, add adhesion testing and gloss verification. If corrosion or outdoor durability is critical, incorporate salt-spray testing into your validation protocol, even if production batches are inspected less rigorously afterward.

Manual vs. Automated Powder Coating: When to Stay Manual and When to Upgrade
Manual powder coating excels when workpieces are irregular in shape, when product mix requires frequent color changes, or when batch sizes are small to medium (typically 10–100 units per day). The flexibility and low capital cost make sense for custom job shops, prototyping facilities, and contract coaters.
However, manual operations struggle with consistency, require experienced personnel, and incur higher labor cost per unit as volume scales. If your daily output exceeds roughly 50 identical or very similar parts, or if a customer demands coating consistency tighter than ±10 µm film thickness uniformity, automated or semi-automated equipment becomes cost-justified.
Semi-automatic systems (reciprocating spray arms or automated gun positioning over a rotating workpiece) offer a middle ground: they maintain consistent spray distance and speed while still allowing manual control of workpiece loading, unloading, and quality checks. Investment is moderate (typically 30–50% of a full automatic line cost), and setup time for new parts is faster than pure manual or full automatic.
From our experience advising manufacturers, the economics usually favor upgrading from manual to semi-automatic around 60–100 pieces per day of the same product. At that volume, labor savings and improved consistency typically pay for the equipment within 12–24 months. For simpler, flatter parts or higher volumes, full automatic systems become attractive.
Operator Skills, Training Requirements, and Best Practices for Hand Spraying
Manual spray quality depends fundamentally on operator discipline and consistency. We've found that even experienced painters benefit from structured training and periodic refresher certification.
Initial training should cover five areas:
-
Pre-treatment verification: operators must understand why each pre-treatment step exists and recognize when it's been done correctly. A short shop floor walkthrough showing examples of clean vs. contaminated surfaces is more effective than a lecture.
-
Grounding procedures: demonstrate how to check and clean grounding contacts, measure resistance, and recognize a "no-go" condition that requires maintenance intervention before spraying.
-
Spray gun operation: teach proper grip, posture, trigger control, and the three core variables (distance, angle, speed). Have operators practice on scrap parts, adjusting distance incrementally and observing how coverage changes.
-
Visual assessment: train the operator to recognize common defects in real time—a thin spot, a bubble forming, a missed corner—so they can correct course on the next part.
-
Documentation: require operators to record gun voltage, air pressure, powder feeder setting, and any anomalies observed during the shift. This log is invaluable for troubleshooting and process improvement.
Best practices we observe in high-performing facilities include:
- A written standard operating procedure (SOP) specific to each product family, posted at the spray workstation.
- Daily pre-shift checks: equipment function test, grounding verification, compressed air filter inspection.
- A "first article" protocol: spray and inspect the first part of a batch before committing the entire batch to production.
- Rotation of operators between different stations to reduce repetitive strain and maintain alertness.
- Periodic proficiency testing: once per month, operators spray a reference part and compare results to a baseline to confirm their technique remains consistent.
Production Capacity Limits of Manual Coating and Cost-Benefit Analysis for Equipment Investment
Manual powder coating capacity depends on workpiece complexity, operator skill, pre-treatment speed, curing cycle time, and part handling logistics. For straightforward, simple-geometry parts (flat panels, simple boxes), a skilled operator can typically spray 20–40 pieces per 8-hour shift. Complex, multi-featured parts (assemblies with recesses, edges, fasteners) reduce this to 10–20 pieces per shift.
Pre-treatment and curing set the true bottleneck. If pre-treatment is manual (hand spraying with alkaline solution, hand rinsing), that step often consumes 50% of the total cycle time. Similarly, if the curing oven has a 20-minute dwell time, you can spray no faster than one part every 20 minutes regardless of spray speed. The practical throughput for small-batch manual operations is often 5–15 finished parts per hour.
Equipment investment analysis for upgrading:
- Manual setup cost: ~5,000–15,000 USD (spray booth, gun, basic pre-treatment tank, convection oven). Low capital, but high labor per unit.
- Semi-automatic upgrade: ~80,000–150,000 USD. Reduced labor, improved consistency, moderate capital.
- Full automatic line: ~200,000–500,000 USD+ depending on complexity. Suitable for 200+ pieces per day.
If your facility produces 50 parts per day at current labor cost and you're considering a semi-automatic upgrade, calculate: (current annual labor cost) − (projected annual labor cost with semi-auto) − (equipment depreciation and maintenance). If this net is positive and payback is within 2 years, the upgrade is usually justified.
More important than raw ROI is quality consistency. If your customer rejects 5% of manually coated parts due to thickness variation or adhesion issues, but your upgraded line reduces defect rate to <1%, the true value is often higher than pure labor savings.
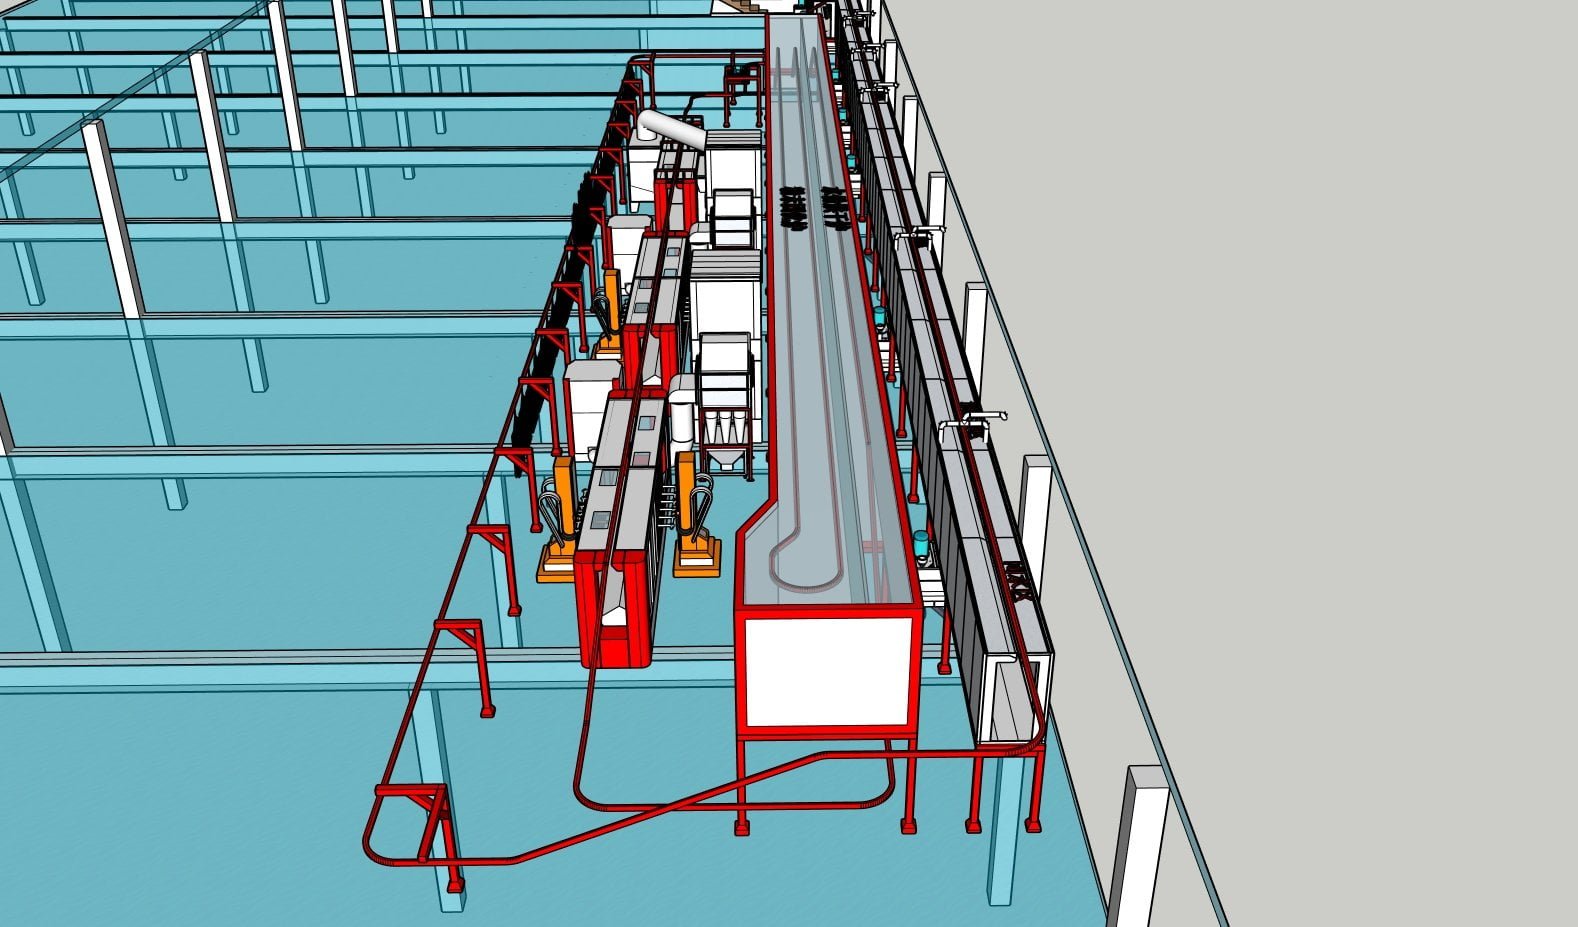
Practical Recommendations for Manual Powder Coating Operations
On surface preparation: Treat it as the first quality gate, not an afterthought. If a part leaves the pre-treatment station, it should be visibly clean and dry, with no residual solution odor or water droplets. Any doubt? Re-treat it. The cost is minimal compared to scrap or customer returns.
On grounding: Check resistance weekly and document it. Establish a visual checklist posted at the spray station listing resistance targets (green = <1 MΩ, yellow = 1–10 MΩ, red = >10 MΩ). Train operators to call maintenance when resistance is yellow or red.
On spray technique: Establish written SOP for each product, including reference photos showing correct spray angle and coverage pattern. Laminate and post it. Review with each operator on their first part of the day.
On air quality: Install an air dryer and filters appropriate to your compressor output. Drain tanks daily. Replace filter elements on schedule, not when you "think" they're dirty. A clogged filter reduces drying efficiency.
On curing: Invest in a simple oven thermometer or thermal profiler to verify that parts are actually reaching target temperature. Don't assume. Confirm at least once per shift.
On defect response: When a defect appears, stop, diagnose, and document the root cause before continuing production. A 15-minute investigation that prevents 100 scrap parts is a huge win.
Conclusion
Manual powder coating remains a valuable, cost-effective option for manufacturers producing small to medium batches of metal parts. Success depends not on complex equipment but on rigorous adherence to fundamentals: thorough surface preparation, reliable grounding, consistent spray technique, and verified curing. Most quality problems we encounter trace back to one of these four areas, not to spray gun sophistication.
Operators who follow discipline—checking pre-treatment, verifying grounding, maintaining air quality, and documenting results—produce coating that rivals semi-automated systems. Conversely, even the best spray gun in an operator's hands without training and process discipline will produce inconsistent results.
If manual coating is your current approach and you're growing, monitor your defect rate, cycle time, and labor cost. When defects exceed 2–3%, cycle time becomes the bottleneck, or labor cost per unit climbs above acceptable limits, that is your signal to evaluate equipment investment. In the meantime, strengthen your fundamentals: better pre-treatment discipline, operator training, and air system maintenance will yield immediate improvements at minimal cost.
For guidance on whether your operation is a candidate for equipment upgrade, or to discuss specific challenges with your current manual process, we welcome the opportunity to review your production data and share what we've learned from similar manufacturers. The difference between adequate coating and excellent coating often comes down to one conversation with someone who has seen both sides of the problem.
Contact us today: WhatsApp +8618925987762 or email ketucoatingline@gmail.com to discuss your powder coating operation and explore whether manual optimization or equipment investment is the right next step for your business.
 English
  German
  Vietnamese
  French