
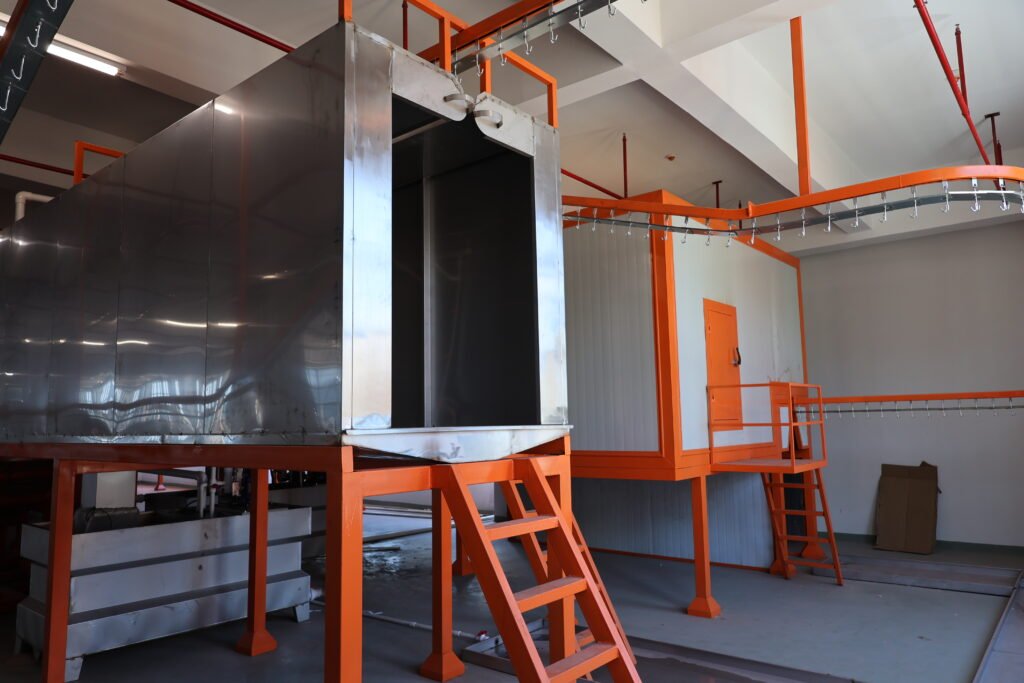
When you're running a powder coating production line, you might assume that if your spray parameters, oven temperature, and pretreatment process are locked in, you can spray everything the same way. But here's what we've found on actual factory floors: metal thickness changes the game. Thin gauge steel, standard thickness parts, and heavy-duty cabinet frames don't all behave the same way during the spray-and-cure cycle. Ignoring this difference often leads to uneven film thickness, adhesion failures, and quality inconsistency—exactly the kinds of problems that frustrate production managers and damage customer satisfaction.
Yes, metal thickness significantly impacts powder coating quality and process parameters. Thicker metal absorbs and radiates heat more slowly during curing, requiring longer baking times and different temperature curves; thinner metals may overheat or cure unevenly. Thickness also impacts pretreatment penetration, grounding stability, and electrostatic powder adhesion consistency. Workpiece thickness directly influences spray gun distance, voltage settings, and overall line speed—ignoring these factors typically results in defects like uneven film thickness, poor adhesion, or incomplete curing across different workpiece sizes.
Understanding why this happens, and what to do about it, is the difference between a coating line that just works and one that consistently delivers high-quality results across your entire product range.
Yes, Metal Thickness Significantly Impacts Powder Coating Quality
From our experience working with cabinet manufacturers, aluminum extrusion shops, and outdoor furniture makers, we can say with certainty: metal thickness is not a detail you can ignore. It's a fundamental variable that touches nearly every stage of your coating process.
The root cause is physics. Thicker metal has more mass and thermal capacity. It absorbs heat more slowly, holds heat longer, and releases it more gradually. Thinner metal is the opposite—it heats up quickly, reaches target temperature fast, but can overshoot or cool prematurely if your parameters aren't adjusted. This isn't an edge case; it's a core reality of electrostatic powder coating that most operators don't consciously plan for.
What makes this tricky is that modern production lines often run mixed SKUs. You might spray cabinet doors (thin gauge steel at 0.5–1.0 mm), cabinet frames (standard gauge at 1.5–2.0 mm), and reinforcement brackets (heavier stock at 3.0–4.0 mm) all on the same line. Without deliberate thickness-aware control, you'll get good results on some parts and mediocre results on others. Quality becomes inconsistent, scrap rates climb, and you spend time troubleshooting problems that are really just a mismatch between metal thickness and process parameters.

How Metal Thickness Affects Heat Transfer and Curing
The core issue is thermal dynamics. When a workpiece enters your curing oven, it doesn't instantly reach the setpoint temperature. It must heat up gradually, pass through the curing window, and then cool back down. How long this takes depends entirely on metal thickness.
Why Thicker Metals Need Longer Baking Times
A thick workpiece—say, a 4 mm reinforced cabinet component—enters the oven at room temperature. The oven air is at 200°C, but the metal's internal temperature is still ambient. Heat must conduct from the surface toward the center. With thick material, this conduction is slow. The surface may reach 200°C in a few minutes, but the internal temperature lags significantly. If your oven dwell time is too short, the interior might only reach 170°C while the surface is already starting to cool down. The result: insufficient cross-linking of the resin, weak final hardness, and potentially poor adhesion.
From our experience with aluminum extrusion customers, we've seen cases where they were running standard oven times and getting inconsistent hardness readings across parts. When we measured internal part temperatures with thermocouples, we found that thicker extrusions were spending half their "cure time" still in the heat-up phase. Once we extended the high-temperature dwell window, consistency improved dramatically.
The practical takeaway: thicker stock requires longer baking times. This isn't about guessing—it's about mapping actual time-temperature curves based on your specific part geometry and material type. We typically recommend thermal profiling for any new thickness range you introduce to your line.
Why Thinner Metals Risk Overcuring and Brittleness
Thin metal—a 0.5 mm door panel, for instance—conducts heat rapidly. Surface temperature reaches setpoint almost immediately. If your oven temperature is set for heavier parts, and you suddenly run thin parts, the entire workpiece heats up uniformly and fast. The temperature can spike well above your target, especially if dwell time isn't reduced.
Overcuring happens when the resin molecules cross-link more than intended, creating a harder but also more brittle coating. The film becomes prone to micro-cracking under impact or flexing, which is especially problematic for parts that vibrate or experience thermal cycling (like outdoor furniture). We've seen this in the field: a furniture maker ran thin-wall aluminum frames at standard oven settings and got beautiful surface gloss initially, but after a few weeks in outdoor sun exposure, the coating cracked and peeled.
The fix: reduce oven dwell time and/or lower the setpoint temperature slightly for thin parts. You're looking for a narrower, carefully controlled heating curve that avoids overshoot.
Metal Thickness and Surface Preparation: What Changes
Many operators assume that pretreatment and drying are independent of metal thickness. That's incorrect. Thickness affects how long it takes for chemical layers to penetrate and how water residue dries.
Pretreatment Penetration Depth Variations
When you immerse a thin vs. thick workpiece in a phosphate pretreatment tank, the chemical reaction happens at the surface, but it also begins to diffuse into microcracks, grain boundaries, and surface asperities. On thin metal, this diffusion is rapid and relatively uniform. On thick metal, if you rely on immersion time alone without sufficient agitation or spray-wash cycles, the chemical may not reach into all the deeper surface recesses uniformly.
This is why spray-immersion hybrid pretreatment lines are so effective: the initial spray impacts the surface with force, driving chemical deeper, and the immersion phase ensures saturation. If you're running a simple immersion setup and notice inconsistent phosphate film thickness on thick parts, the answer often isn't "increase chemical concentration"—it's "ensure adequate spray-washdown energy and immersion duration."
Water Drying Completeness Before Spraying
After pretreatment comes the rinse and dry stage. Here's where thickness matters again: thin metal dries fast. A 0.5 mm door panel can be moisture-free in 30–40 seconds at moderate air velocity. A 3 mm casting may take 90+ seconds. If your drying oven has a fixed resident time, and you're mixing thin and thick parts, some will be over-dried (which is rarely a problem) and others will enter the spray booth with residual moisture still on the surface.
Any moisture remaining on the workpiece creates a barrier to powder adhesion. The charged powder particles are repelled by the water film; they either don't stick or stick poorly. We've traced many "low transfer efficiency" complaints to this root cause: the drying stage wasn't long enough for the thickest parts in the batch.
Our approach with clients: map actual surface moisture levels (using humidity sensors or simple weight-loss measurement) across your part thickness range, then set drying time based on the slowest-drying geometry. It's usually worth 10–15 seconds of extra drying time to eliminate moisture-related adhesion defects.
Grounding Quality and Spray Efficiency: The Thickness Factor
This is where thickness affects electrical performance, which directly impacts how much powder actually sticks to the workpiece.
Why Thin, Flexible Parts Struggle With Grounding Contact
Thin metal is more flexible. When you hang a thin part on a fixture or contact point, there's often some deflection or gap at the contact area due to the part's weight and the geometry of the support. If the contact isn't rock-solid, electrical resistance increases. The workpiece is supposed to be at ground potential (0V) to attract the charged powder effectively. But if grounding contact is poor, local voltage can build up, and the electrostatic field becomes unstable.
We've seen this with thin aluminum extrusions. The extrusion is hung on a standard contact clip, but because the material is so thin and light, the part can shift slightly during spray, creating micro-gaps at the contact. Powder transfer efficiency drops 5–10%, and you get skipped areas or uneven buildup.
Thicker, heavier parts—cabinet frames, for example—have more rigidity and typically press firmly against the contact point under their own weight, ensuring consistent grounding.
How This Reduces Powder Transfer Efficiency
When grounding is questionable, the electrostatic voltage at the gun (typically 60–90 kV) can't fully "pull" the powder onto the workpiece. Some powder still gets attracted, but a higher percentage drifts toward the booth walls or gets pulled toward other grounded surfaces. Your powder transfer efficiency (how much powder actually deposits vs. how much you spray) can drop from 85–90% down to 75–80% or worse.
For a production run, this means higher powder consumption, more waste, and higher costs. It also makes color matching harder because you're essentially varying the powder deposition rate across your line.
Our standard fix: improve contact point design for thin parts. Use multi-point contacts, serrated contact surfaces, or articulated fixtures that conform to the part geometry. It's a small investment upfront but saves a lot of waste and rework downstream.
Common Powder Coating Defects Related to Metal Thickness
Let's get concrete. Here are the specific quality problems we see in the field when thickness isn't managed properly.
Problems You'll See on Thin Metal Parts
Insufficient film thickness: The coating builds unevenly, and certain areas stay below your minimum spec (often 40–80 microns for powder). Edges and high-point areas might be acceptable, but recesses and transitional zones are thin.
Uneven color or gloss: Because coating isn't uniform, color saturation and light reflection vary across the part. What should look like a single matte finish looks blotchy or streaky.
Poor adhesion and edge lift: Thin metal heats and cools fast. If the oven curve isn't optimized, the resin may not fully cross-link, or it may actually over-cure and become brittle. When the part cools, differential contraction can cause edge delamination.
Burn marks or discoloration: On thin parts, overheat is easy. If oven temperature is 10°C too high, thin parts hit 210°C while thick parts are at 195°C. This can cause the powder surface to yellow, darken, or show scorch marks.
Problems You'll See on Thick Metal Parts
Thick, uneven buildup with cracking: You spray longer to reach your thickness target on a thicker part. But if the thick part's oven dwell isn't extended, the surface may fully cure while the interior is still under-cured. The surface-to-interior stress mismatch causes the coating to crack or peel.
Incomplete cure and weak hardness: The classic sign is when you can easily scratch the finish with a fingernail or light abrasion. This happens because the internal resin matrix didn't have enough time at temperature to complete cross-linking.
Sagging or flow-back: On vertical or sloped surfaces of thick parts, if the pretreatment wasn't clean or if too much powder is applied at once, the still-plastic powder layer can sag before it gels. The result is a visible run or uneven surface.
Quality Inconsistency When Mixing Thin and Thick Pieces
The hardest scenario is when a single production run includes mixed thicknesses. Your spray parameters get tuned for medium-thickness parts. Thin parts get over-sprayed (too much powder, overheat risk). Thick parts get under-cured (insufficient time and energy). You end up with high scrap rates and long troubleshooting cycles.
We worked with a cabinet maker who was running both thin door skins (0.5 mm) and structural frames (2.5 mm) in the same batch. Their one-size-fits-all approach led to 8–12% scrap. Once we segmented the line (separate spray and cure stations for each thickness range), scrap dropped to <2%.
How Much Thickness Does Powder Coating Add to Metal?
This is a practical question that often gets overlooked: how thick is the powder coating itself?
Typical powder coating film thickness, after cure, ranges from 40 to 100 microns (0.04–0.1 mm) depending on the powder type, spray parameters, and application. For comparison, that's roughly the thickness of a human hair.
- Thin coat (light duty, indoor use): 40–60 microns
- Medium coat (general purpose): 60–80 microns
- Heavy coat (outdoor, high-corrosion environments): 80–120 microns
The coating adds negligible dimensional change for most parts. Where it does matter is in assemblies with tight tolerances—for example, if you're coating parts before final welding or assembly. A 100 micron coating on both surfaces of a joint can change fit by 0.2 mm, which might matter.
Also, thicker coatings look better and last longer, but they cost more (more powder, longer oven time, higher energy consumption). The key is hitting your application's actual requirement, not over-coating "just to be safe."
Adjusting Your Spray Parameters Based on Metal Thickness
This is where theory becomes practice. Here's what we actually change on our production lines when thickness varies.
Gun Distance, Voltage, and Air Pressure Settings
Gun distance: For thin parts, we reduce distance slightly (maybe 180–220 mm instead of 200–250 mm) to increase powder density and transfer efficiency. For thick parts, a slightly longer distance (220–280 mm) gives more time for powder to flow and level before landing.
Voltage: Thin parts often benefit from slightly lower voltage (65–75 kV instead of 80–90 kV) to avoid overshoot and back-ionization. Thick parts, especially rough-surface castings, may need higher voltage (80–95 kV) for better penetration into surface features.
Air pressure: Lower air pressure for thin parts (4–5 bar) to reduce overspray and powder drift. Higher pressure for thick parts (6–7 bar) improves powder delivery and coating density.
These aren't huge changes, but they're deliberate. Many operators run fixed spray parameters all day; we recommend at least a two-tier setup: one parameter set for parts <1.5 mm, and another for parts >2.0 mm.
Optimizing Curing Temperature Curves
Instead of a flat oven temperature, use a ramp curve:
- Thin parts: Slower ramp to setpoint (5–8 minutes to reach 200°C), hold at setpoint for 10–12 minutes, then cool gradually.
- Thick parts: Faster ramp (3–5 minutes to setpoint), hold at setpoint for 18–25 minutes, then cool more gradually to avoid thermal shock.
This requires either a programmable oven controller or multiple oven zones. If you're still running single-temperature ovens, consider a retrofit. The payoff is worth it.
Fine-Tuning Line Speed and Pretreatment Time
Line speed must account for oven residence time. A typical formula: residence time (minutes) = oven length (meters) / line speed (m/min) × 60.
For mixed-thickness runs, we often adjust line speed in two passes: slow pass for thin parts (0.3–0.5 m/min in spray and oven), fast pass for thick parts (0.5–0.8 m/min). Yes, this means two separate production runs, but consistency improves and scrap drops.
Pretreatment time: Thin parts need 60–90 seconds in the pretreatment tank (including spray and immersion stages). Thick parts need 90–120 seconds. If you're mixing, use the longer time as your standard.
The 80/20 Rule for Coating: What It Means for Your Production
You may have heard the "80/20 rule" for coating thickness. Here's what it means:
80% of your coating thickness should be achieved during the primary spray pass. The remaining 20% comes from flow and leveling during the cure cycle.
Why does this matter for thickness variation? Because thinner metal heats up so fast, the 20% flow-and-level phase is compressed. If your gun parameters are built on the assumption of typical thermal dynamics, thin parts won't flow as much. You get a thicker, less-smooth surface (orange peel effect). Thick parts, with slower heat-up, have a longer leveling window and produce smoother finishes.
Best Practices for Optimal Film Thickness
-
Measure actual film thickness regularly using a coating thickness gauge (DFT gauge). Don't guess. Measure parts across your thickness range to see if there's a pattern.
-
Use two-stage application if available: First spray pass for coverage, light oven flash, second spray pass for buildup. This gives more control over final thickness.
-
Adjust spray parameters, not oven temperature, for thickness problems. If film is too thin, increase spray time or reduce gun distance. Don't turn up the oven; that's the wrong lever.
-
Profile your oven with real parts and thermocouples. Know the actual temperature distribution, not just the setpoint. A "200°C oven" might be 195°C on one end and 210°C on the other.
-
Maintain consistent pretreatment quality. A good phosphate film (3–5 microns) improves adhesion and powder transfer, which makes it easier to hit your film thickness target without excessive spraying.
Real-World Examples: How Different Industries Handle Thickness Variations
Cabinet and Switchgear Manufacturers
We work with cabinet makers who run steel ranges from 0.8 mm (door panels) to 4.0 mm (structural frames). They use a three-tier spray setup:
- Light gauge (0.8–1.2 mm): 180 mm gun distance, 70 kV, fast spray pass, shortened oven time.
- Medium gauge (1.5–2.5 mm): 210 mm gun distance, 80 kV, standard spray, standard oven curve.
- Heavy gauge (3.0–4.0 mm): 250 mm gun distance, 85 kV, extended spray time, extended oven dwell.
They also manually batch by thickness to avoid mixing in a single production run. Scrap rates hover around 2–3%.
Outdoor Furniture Producers
Aluminum furniture makers face the opposite challenge: all their parts are aluminum, so pretreatment is different (chromate-free conversion coating), but thickness varies widely. A single lounge chair might have 1.5 mm frames, 2.0 mm seat supports, and 3.5 mm corner reinforcements.
Their solution: segment the cure oven into two zones—a lower-temperature zone (180°C) for thin parts, a higher-temperature zone (210°C) for thick parts. Parts stay on a conveyor that moves continuously, but they soak in the appropriate zone based on dwell time. It's more complex, but they achieve 95%+ first-pass quality.
Aluminum Extrusion and Raw Metal Parts
Extruders typically have more uniform thickness (within a single profile), but they run many different profiles. A 2.0 mm extrusion cures differently than a 4.0 mm extrusion. They often keep a simple lookup table: thickness range → oven dwell time and spray voltage. It's low-tech, but effective.
Key Takeaways and Action Steps for Your Facility
If metal thickness is something you haven't consciously managed, here's where to start:
-
Document your actual part thickness range. Measure your current production. You'll likely find you have more variation than you realized.
-
Perform a thermal profile on your thinnest and thickest parts. Use a thermocouple attached to a part and log temperature as it goes through your oven. You'll see exactly where your current curve is failing.
-
Implement a simple two-tier spray parameter set: one for thin parts, one for thick parts. This is a quick win with immediate payoff.
-
Adjust oven dwell time by thickness. If your oven is 5 meters long and you run at 0.5 m/min, add 2 minutes for thicker parts by reducing line speed or adding a hold zone.
-
Start measuring film thickness with a DFT gauge. You can't improve what you don't measure.
-
Consider splitting production runs if your thickness range is >3:1 (e.g., 1 mm to 3.5 mm parts). The complexity of managing such a wide range in a single pass usually isn't worth it.
-
Train your operators on the "why" behind thickness-aware adjustments. Once they understand the thermal dynamics, they'll spot problems faster and suggest improvements.
From our experience working with cabinet, furniture, and extrusion manufacturers, the facilities with the best quality and lowest scrap rates are the ones that treat metal thickness as a deliberate variable, not an afterthought. The investment in thermal profiling, parameter optimization, and line segmentation pays for itself within weeks in reduced scrap and rework.
More Related Questions
What is the best thickness for powder coating?
The best thickness depends on application. For general industrial use, 60–80 microns is standard. For high-corrosion outdoor environments, 80–120 microns. For light indoor use, 40–60 microns is acceptable. Thicker isn't always better—too thick can lead to adhesion issues and excess cost.
What causes uneven powder coating thickness?
Uneven thickness usually stems from: inconsistent gun distance, improper grounding, inadequate surface preparation, variable spray pressure, or insufficient oven time. Metal thickness variation is one of the most-overlooked causes.
How does metal thickness affect cure time?
Thicker metal heats slowly and requires longer oven residence time to fully cure. A rule of thumb: add 30–50% oven time when thickness increases by 2–3 mm.
Can you powder coat very thin metal?
Yes, but it requires care. Thin metal heats and cools fast, so oven parameters must be tighter. Expect more overshoot risk and potential brittleness if not properly controlled.
Conclusion
Metal thickness is not a minor variable in powder coating—it's a primary driver of process parameters, cure dynamics, and final quality. Whether you're coating thin door panels or heavy reinforced frames, understanding how thickness affects heat transfer, electrical grounding, and surface preparation is essential to running a stable, high-quality production line. Start by measuring your parts, profiling your oven, and adjusting parameters deliberately. The result will be lower scrap, better consistency, and higher customer satisfaction.
If you'd like to discuss how to optimize your production line for mixed-thickness parts or want help designing a thickness-aware spray and cure setup, we're here to help. Contact us today for a facility assessment.
 English
  German
  Vietnamese
  French