
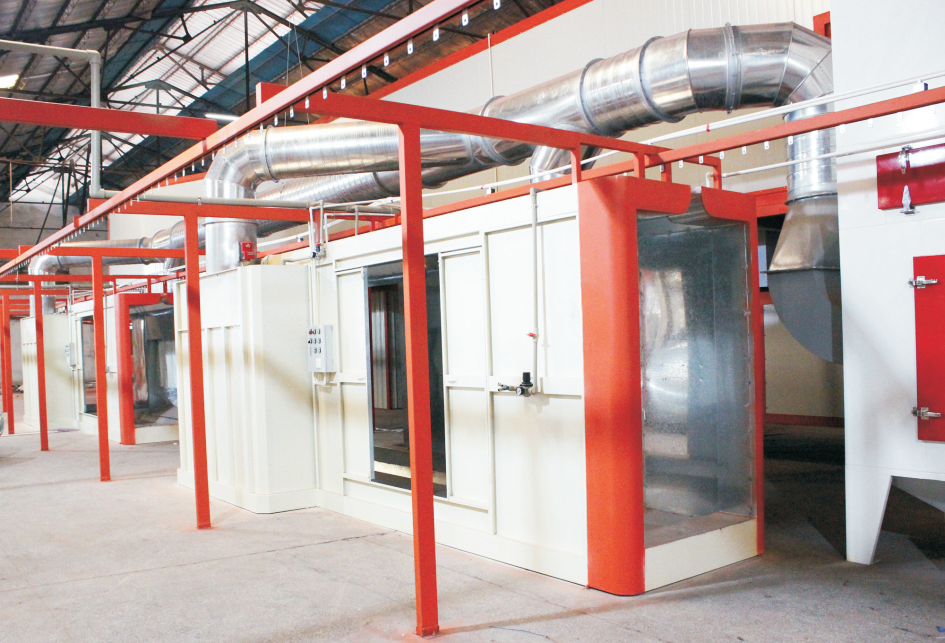
The Function of the Surface Adjustment Process and Its Control Points in Powder Coating Pre-treatment
When you're running a powder coating line, you've probably noticed that some production runs deliver flawless surfaces while others struggle with adhesion problems, blistering, or poor finish quality. The difference often comes down to a step many operators overlook: surface adjustment.
Surface adjustment is a critical intermediate step positioned between degreasing[^1] and phosphating[^2] in the pre-treatment system. Its primary function is to remove residual salts, weak oils, and contaminants left behind after degreasing, while simultaneously adjusting the chemical activity state of the workpiece surface to prepare it for subsequent phosphating or direct coating. The process typically uses spraying or immersion methods, with control over solution concentration, temperature, and contact time. When surface adjustment is inadequately performed, the result is predictable: bubbling, poor adhesion, incomplete coverage, and a spike in scrap rates. Conversely, when done well, surface adjustment delivers dramatically improved coating consistency, higher first-pass yield, and a measurable reduction in rework.
From our experience at Ketu Machinery, I can tell you that surface adjustment is often the difference between a production line that runs smoothly and one that generates constant quality complaints. Let me walk you through what makes this process so essential, how to control it properly, and what to watch for when things start to go wrong.
What is the Surface Adjustment Process and Where Does It Fit in Pre-treatment?
Surface adjustment sits in a specific position within the pre-treatment workflow, and understanding its placement helps explain why it matters so much.
The typical pre-treatment sequence runs like this: degreasing → surface adjustment → rinsing → phosphating → passivation → pure water rinse → drying. Some lines compress this differently depending on the substrate material and final coating requirements, but surface adjustment almost always comes after degreasing and before phosphating.
Think of degreasing as the first pass at cleaning. It removes bulk oil, cutting fluid, fingerprints, and obvious contaminants. But degreasing alone leaves behind trace residues—particularly dissolved salts from the degreasing solution itself, and stubborn organic residues that alkaline degreasers don't fully eliminate. If you skip surface adjustment and go straight to phosphating, those residues interfere with the phosphate conversion film formation. The phosphate layer becomes uneven, thin in some spots, thick in others, or fails to form completely in problem areas.
Surface adjustment solves this by using a mildly acidic solution to: (1) dissolve and remove residual salts that alkaline degreasing left behind, (2) gently etch the metal surface to increase its chemical receptivity, and (3) prepare the surface chemistry for efficient phosphating. It's not heavy-duty rust removal or aggressive cleaning—it's precision preparation.
In our pre-treatment system designs at Ketu, we typically allocate about 30–60 seconds for surface adjustment, depending on the solution chemistry and the workpiece material. The solution itself is dilute and much gentler than a direct acid wash, which means it won't damage thin-wall stampings or create new surface defects. This is why surface adjustment is sometimes called a "buffering" step—it buffers the transition between the harsh alkaline degreasing environment and the phosphating stage that follows.
 )
)
Core Functions of Surface Adjustment in Coating Quality
The real value of surface adjustment emerges when you look at what it does—or fails to do—for your final coating.
How surface adjustment removes residual contaminants
After degreasing, workpiece surfaces still carry hidden problems. Alkaline degreasing solutions contain sodium salts, and when you rinse the workpiece, some of these salts remain trapped in surface pores, crevices, and under oxide layers. Additionally, if the degreasing rinsing wasn't thorough, organic residues persist. These aren't visible to the naked eye, but they are electrochemically active and they interfere with both phosphating and electrostatic powder[^3] adhesion.
Surface adjustment solution—typically formulated with weak organic or mineral acids—dissolves these residual salts. The acid slightly lowers the pH at the metal surface, which triggers dissolution of salt crystals and loosens stubborn organic films. The gentle spraying or soaking action physically carries these dissolved contaminants away.
From our field experience, I can tell you that inadequate surface adjustment creates a predictable symptom pattern: your first shift of the day may look fine, but by mid-shift, when the phosphating tank chemistry has drifted slightly and residual salts have accumulated in the workpiece surface layer, your adhesion plummets. This is classic evidence that surface adjustment is being compromised.
Impact on coating adhesion and finish quality
Surface adjustment directly controls two things that determine coating adhesion and appearance: surface cleanliness and surface chemical state.
Surface cleanliness is straightforward: if residual salts remain, they create weak points where the phosphate layer can't form properly. When powder lands on these weak spots during electrostatic spraying, the powder adheres to a defective conversion film rather than a robust one. During curing, adhesion fails first in these compromised areas, leading to edge flaking, localized adhesion loss, and ultimately premature coating failure in service.
Surface chemical state is more subtle but equally important. A properly adjusted surface has the right level of micro-etching and chemical receptivity. The metal surface is slightly roughened—not visibly, but at the microscale—and the oxide layer has been partially converted into a state that accepts phosphate conversion film formation efficiently. This is why, when surface adjustment is done correctly, your subsequent phosphating stage becomes more efficient. Your phosphate film forms faster, deposits more uniformly, and creates a more consistent base for powder adhesion.
In cabinet, furniture, and aluminum component applications, this difference directly translates to visible quality. A workpiece that has passed through proper surface adjustment will show more uniform color coverage, better gloss consistency, and superior edge-coverage than one that hasn't. The coating looks more professional, and more importantly, it lasts longer in field conditions.
 )
)
Key Process Parameters and How to Set Them
Surface adjustment is controlled by a handful of critical parameters. Get these right, and your line runs smoothly. Let them drift, and your quality becomes unpredictable.
Temperature, concentration, and spray pressure
Temperature directly affects reaction speed. Typical surface adjustment solutions operate between 40–60°C. Warmer solution dissolves salts and etches faster, which means you can use shorter contact times. Colder solution requires longer soaking. Most production lines target around 50°C as a balance point—fast enough to keep cycle time reasonable, but not so hot that it accelerates tank degradation or causes thermal shock when the workpiece moves downstream to the phosphating stage.
Concentration is measured in acid strength, usually expressed as a percentage or by titration[^4] method. Your surface adjustment solution supplier will provide a recommended concentration range—typically 1–5% by volume, depending on the chemistry. Concentration is critical because: if it's too weak, you don't remove enough residual salts; if it's too strong, you risk over-etching and potential dimensional or surface damage on precision parts.
From our projects at Ketu, I've seen factories that don't monitor concentration drift. Their operators assume the tank is fine until suddenly adhesion starts failing. By that time, the concentration has dropped 20–30% due to evaporation and carryover, and half their production from the past two days is compromised. This is why regular concentration checks—ideally daily—are non-negotiable.
Spray pressure controls whether the solution is applied uniformly. Too low, and some areas of the workpiece don't receive enough contact with the solution; too high, and you waste solution and create aerosol drift (a safety and environmental issue). Typical range is 2–4 bar for spray-type surface adjustment systems. The goal is to wet every surface of the workpiece thoroughly without creating unnecessary mist.
Immersion time and flow rate optimization
If you're using an immersion-type surface adjustment stage (where the workpiece soaks in a tank), immersion time is your key control variable. Typical times run 30–120 seconds depending on solution strength, temperature, and workpiece complexity. Complex parts with tight corners, deep threads, or recessed areas need longer times to ensure the solution reaches every surface.
Flow rate optimization matters for both spray and immersion stages. For spray systems, flow rate determines how much solution reaches the workpiece per unit time. Too low a flow rate starves the workpiece of solution; too high wastes material. The sweet spot is usually found by trial: set the flow so that when the workpiece exits the spray chamber, it's visibly wet but not streaming with excess liquid. This balance minimizes solution carryover to the next stage while ensuring adequate coverage.
In immersion tanks, flow rate refers to how actively the solution is being circulated. Most modern surface adjustment tanks include a recirculation pump. Higher circulation keeps the solution homogeneous and removes dissolved contaminants from the tank surface, preventing them from redepositing on incoming workpieces. We typically recommend circulation rates that achieve 2–3 complete tank turnovers per hour, but your system supplier should provide guidance based on tank volume.
Surface Adjustment Requirements by Substrate Material
Not all metals respond identically to surface adjustment, which is why customizing this stage to your specific material is essential.
Steel and iron substrates
Steel and iron are the most forgiving materials for surface adjustment. They oxidize readily, and the acidic surface adjustment solution efficiently dissolves oxide layers and residual salts. Standard parameters typically work well: 50°C, 1.5–3% concentration, and 30–60 second contact time.
However, the phosphating stage that follows surface adjustment is where steel shows its strong response. A well-adjusted steel surface accepts phosphate film formation eagerly, creating a uniform, micron-scale crystalline layer that provides excellent adhesion. This is why cabinet makers and metal furniture manufacturers favor steel—the pre-treatment economics are straightforward, and coating adhesion is predictable.
One caution: on heavily rusted steel or mill-scale iron, surface adjustment alone isn't sufficient. These materials require a prior stage—either pickling, shotblasting, or abrasive cleaning—to remove the scale before surface adjustment can be effective. Surface adjustment is meant to refine the surface, not to remove heavy corrosion products.
Aluminum and zinc-plated substrates
Aluminum is more sensitive to surface adjustment chemistry. The acidic environment of surface adjustment solution can etch aluminum[^5] aggressively, and if you're not careful, you can over-etch, creating surface pitting or dimensional loss on thin-wall extrusions or stampings.
For aluminum, we recommend: slightly lower concentration (1–2% rather than 2–3%), shorter contact times (30–45 seconds rather than 60–120), and careful pH monitoring. Many aluminum-specific surface adjustment formulations are buffered—meaning they contain additives that prevent the pH from dropping too steeply, protecting the aluminum from over-etching.
Zinc-plated substrates occupy middle ground. Zinc-plating can be relatively thin, and aggressive surface adjustment can dissolve or pit it. The standard approach is to use a zinc-compatible surface adjustment solution and keep parameters conservative. Typical settings: 45°C, 1–2% concentration, 30–60 second immersion.
For both aluminum and zinc-plated parts, the post-surface adjustment rinse becomes critical. Residual surface adjustment solution must be thoroughly removed, because any carryover into the phosphating stage can disrupt the phosphate film formation. This is why many high-quality aluminum coating lines incorporate an additional rinse stage between surface adjustment and phosphating.
Solution Management and Quality Control
Surface adjustment solution doesn't last forever. It degrades through oxidation, accumulates contaminants from the workpieces it treats, and loses active acid strength over time.
Monitoring solution concentration and contamination
Concentration drift is the most common management issue. The solution gradually weakens as acid is consumed during reactions with workpiece surfaces, and as water evaporates from the tank. You must test concentration regularly—we recommend daily for high-volume lines, at minimum weekly for lower-volume operations.
Testing methods include:
- Titration[^6] (most accurate, requires lab work or on-site testing kit)
- Refractometer (quick, field-friendly, reasonably accurate)
- Supplier-provided test strips (convenient but less precise)
When concentration falls below the manufacturer's recommended minimum (typically 1% for weak-acid solutions), that's your signal to either add fresh concentrate or plan for a tank changeout.
Contamination is the second control variable. As the surface adjustment solution processes workpieces, it dissolves salts, oxides, and organic residues from the surface. Some of this contamination settles as sludge at the tank bottom; some remains suspended. Over time, accumulated contamination reduces solution effectiveness and can cause surface deposits on outgoing workpieces.
Management approaches include:
- Regular tank filtration (weekly or bi-weekly through a 100–200 micron filter)
- Periodic settling and bottom-sludge removal
- Tank water-level monitoring (to catch evaporation and plan makeup)
From our Ketu experience, I've seen factories that resist tank maintenance, thinking they can extend solution life indefinitely. The result is always the same: quality deterioration, then sudden adhesion failures, then emergency line shutdown while they changeout the tank and troubleshoot rework. Disciplined maintenance costs less than the chaos of failure.
Replacement cycles and preventive maintenance
Plan for surface adjustment tank changeouts roughly every 3–6 months for high-volume lines, or annually for lower-volume operations. This timeline depends on:
- Daily workpiece volume processed
- Workpiece material (heavily rusted steel dirties the tank faster than clean aluminum)
- Contamination control practices (filtered tanks last longer)
Preventive maintenance during the solution's life includes:
- Daily: visual inspection for visible sludge, foam, or discoloration
- Weekly: concentration test
- Bi-weekly: filter changeout or tank filtration
- Monthly: full chemistry review (pH, concentration, appearance)
- Quarterly: tank drain and inspection, heater/pump function check
Investing in preventive maintenance discipline prevents emergency downtime and protects your downstream phosphating and coating quality.
Surface Adjustment Requirements by Substrate Material
| Substrate Type | Temperature (°C) | Concentration (%) | Contact Time (sec) | Key Precaution |
|---|---|---|---|---|
| Steel / Iron | 48–55 | 2–3 | 45–90 | Ensure thorough rinsing before phosphating |
| Aluminum | 45–50 | 1–2 | 30–60 | Prevent over-etching; use aluminum-specific formula |
| Zinc-plated | 45–52 | 1–2 | 30–60 | Minimize aggressive etching of thin plate |
| Stainless Steel | 50–55 | 1.5–2.5 | 60–90 | Longer time may be needed; monitor for pitting |
Identifying and Troubleshooting Surface Adjustment Defects
When things go wrong downstream—in adhesion, appearance, or durability—the root cause often traces back to surface adjustment. Learning to diagnose these problems saves time and money.
Common quality indicators and inspection methods
Visual inspection of post-adjustment workpieces reveals several clues:
- Oily sheen or residual film → Surface adjustment concentration too low, or immersion time too short
- Dull, chalky, or frosted appearance → Possible over-etching (concentration too high, time too long) or contamination in the solution
- Uneven color or patchy appearance → Uneven spray coverage, low spray pressure, or blockages in spray nozzles
- Visible salt crystals or white deposits → Residual salts not dissolved; solution strength inadequate
Post-phosphating checks are equally valuable. A well-adjusted surface should accept phosphate film uniformly. If phosphate coverage is mottled or thin in patches, suspect surface adjustment problems.
Adhesion testing (cross-hatch or pull-off tests[^7] on coated samples) often reveals surface adjustment failures. Poor adhesion that appears randomly across the production run, rather than consistently on one part shape, typically points to surface adjustment drift rather than spray-gun or fixturing issues.
Diagnosing and correcting common failures
Symptom: Bubbling or adhesion loss appearing mid-shift
Most likely cause: Surface adjustment solution concentration has drifted below specification. The tank has been processing workpieces all morning, and acid strength has declined.
Correction: Stop, perform a concentration test. If below spec, add fresh concentrate according to supplier instructions. Drain and refill if concentration is severely depleted.
Symptom: Uniform poor adhesion across all workpieces
Could indicate: (1) Surface adjustment stage is completely bypassed or malfunctioning, (2) solution has not been changed in months and is exhausted, or (3) upstream degreasing is failing, leaving gross contamination that surface adjustment can't handle.
Correction: Verify the surface adjustment stage is running (visual inspection, flow rate check). Test solution concentration and appearance. If solution is clearly degraded (dark, sludgy, foul-smelling), perform emergency tank changeout. Separately, run a test without coating—pull a part immediately after surface adjustment and before phosphating, and examine it under inspection lighting for residual oil or contamination.
Symptom: Coating coverage is poor on edges, corners, or recessed areas
Possible cause: Spray pressure too low, or immersion time insufficient for complex-geometry parts to receive complete solution contact.
Correction: Increase spray pressure incrementally (in 0.5 bar steps) and re-test. If using immersion, increase soak time by 15–30 seconds. Re-run test samples and evaluate.
Symptom: Visible salt deposits or white residue on workpiece surface after surface adjustment
Cause: Solution concentration too low to fully dissolve all residual salts from the degreasing stage.
Correction: Increase concentration by 0.5–1% (or per supplier guidance) and allow tank to stabilize for 30 minutes before resuming production. Run test samples.
Integration with Phosphating and Passivation Systems
Surface adjustment doesn't exist in isolation. Its performance directly affects the phosphating stage that follows, and both stages together determine the quality of the conversion film[^8] that will support the powder coating.
Phosphating works best when the incoming surface has been properly adjusted. A well-adjusted surface is:
- Free of residual salts and weak oils
- Micro-etched and chemically receptive
- Rinsed clean and ready for immersion in the phosphating solution
When these conditions are met, the phosphate conversion film forms uniformly, rapidly, and robustly. The film consists of fine metal phosphate crystals that create an excellent mechanical and chemical bond for powder coating adhesion.
If surface adjustment is poor, phosphating cannot compensate. A phosphating solution can't form a strong film on a contaminated or inadequately prepared surface. The result is thin, uneven, or failed phosphate coverage—which then manifests as adhesion loss or cosmetic defects in the final coating.
Passivation (or post-phosphate drying/sealing) also depends on upstream surface adjustment quality. If the substrate surface and phosphate film are both well-prepared, passivation step locks in coating protection. If not, passivation merely seals defects into place.
This is why, in our Ketu production line designs, we treat surface adjustment, phosphating, and passivation as an integrated system. We don't optimize surface adjustment parameters in isolation; we optimize them as a set, testing end-to-end from raw material through final coating to confirm that the entire pre-treatment chain is working in harmony.
Practical Recommendations for Your Production Line
From my years of working with coating lines in the field, here are the key takeaways:
1. Don't minimize surface adjustment as "just another rinse stage." It's the linchpin that determines whether your entire pre-treatment system is actually preparing surfaces adequately or just going through the motions.
2. Establish a disciplined testing and maintenance routine. Check concentration daily on high-volume lines. Change the tank every 3–6 months. These investments are insurance against quality collapse.
3. Customize parameters to your material and process. Steel tolerates slightly more aggressive settings than aluminum. Each substrate and each product line may need fine-tuning. Run test batches and measure both pre-phosphate surface quality and final coating adhesion before declaring your settings locked in.
4. When you encounter adhesion or appearance problems downstream, ask yourself: "Did surface adjustment work today?" Trace backward through your pre-treatment chain before assuming the problem is in spray gun, fixturing, or curing. Statistically, about 60–70% of adhesion complaints in my experience trace back to pre-treatment gaps, with surface adjustment being one of the most common culprits.
5. Don't overlook the importance of rinsing between surface adjustment and phosphating. A thorough rinse removes dissolved salts and excess solution, preventing contamination of the phosphating tank and ensuring that the phosphate film forms cleanly.
Conclusion
Surface adjustment is the often-overlooked hero of powder coating pre-treatment. It sits between degreasing and phosphating, quietly removing residual salts and preparing surface chemistry. When it works, your coating adhesion is reliable, your finish is uniform, and your rework rate is low. When it's neglected or allowed to drift, you get bubbling, adhesion loss, and customer complaints.
The control points are straightforward: maintain temperature, monitor concentration, optimize spray pressure or immersion time, and stay disciplined about tank maintenance and changeout cycles. Integrate surface adjustment performance checks with your phosphating and passivation stages so the entire pre-treatment chain works as one system.
If you're operating a powder coating line and you haven't paid close attention to surface adjustment lately, I'd recommend stopping to audit that stage. Check the solution condition, verify the parameters, and run some test parts with adhesion testing. You may be surprised at what you find—and at how much improvement a few adjustments can deliver.
For consultation on optimizing your pre-treatment system or to discuss surface adjustment configuration for your specific substrate and product mix, please reach out to us at Ketu Machinery. We work with coating line operators worldwide to diagnose pre-treatment challenges and design solutions that improve both quality and efficiency.
Contact us:
WhatsApp: +8618925987762
Email: ketucoatingline@gmail.com
[^1]: A solution or compound used to remove oils, greases, and other contaminants from metal surfaces before coating or processing.
[^2]: A chemical conversion process that creates a protective phosphate layer on metal surfaces to enhance adhesion and corrosion resistance.
[^3]: A painting or coating application technique that uses electrical charge to apply fine particles to a grounded metal surface.
[^4]: An analytical chemistry method used to determine the concentration of a solution by adding a reagent of known strength until a reaction endpoint is reached.
[^5]: A lightweight, corrosion-resistant metal element widely used in aerospace, automotive, and manufacturing industries.
[^6]: A laboratory analysis method that precisely measures acid or base concentration in a solution using a standardized titrant.
[^7]: A quality control test method that measures how strongly a coating adheres to a substrate surface, commonly used in coating durability evaluation.
[^8]: A thin chemical layer formed on a metal surface through treatment to provide corrosion resistance and improve coating adhesion properties.
 English
  German
  Vietnamese
  French