
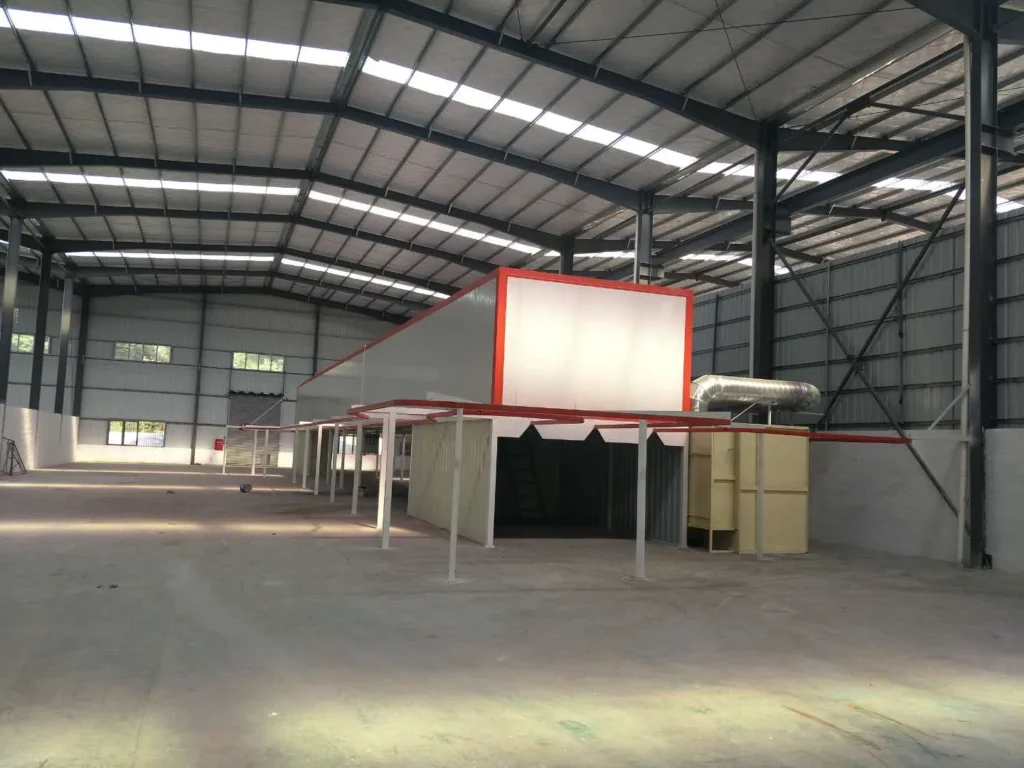
How to Maintain a Curing Heating Oven (Drying Stove): Complete Maintenance Guide
When your powder coating line is running smoothly, it's easy to overlook the heart of the operation—the curing heating oven. But neglect this critical equipment, and you'll quickly face coating defects, production delays, and expensive repairs. From my years working with electrostatic powder coating lines across different industries, I've learned that most coating quality problems don't originate in the spray booth or at the spray gun. Many trace directly back to inconsistent oven temperature, poor thermal distribution, or deteriorating heating components.
Proper curing oven maintenance requires a systematic approach covering thermal components, circulation systems, and safety devices at different intervals. Daily checks should verify temperature stability and thermal consistency; weekly inspections include verifying heating element integrity, cleaning air vents, and confirming sensor accuracy; monthly maintenance involves inspecting insulation layers, checking blower bearings, and testing temperature controls. Critical attention is needed for heating tube corrosion, thermal sensor calibration drift, hot air circulation blockages, and sealing degradation. Regular preventive maintenance extends equipment lifespan, reduces energy waste, ensures consistent coating quality, and prevents costly production downtime—particularly important for high-temperature cycles where thermal consistency directly impacts powder cure quality and adhesion performance.
The difference between a production line that runs reliably for years and one that becomes a chronic troublemaker often comes down to this: the factories that maintain their ovens systematically never have to learn the hard way that a small leak in the oven door costs far less to fix than a batch of rejected parts due to under-curing.
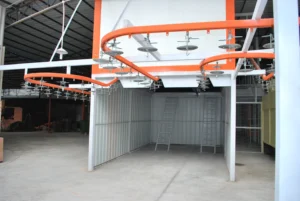
Why Proper Maintenance of Curing Ovens Matters
I've watched production managers scramble when their curing oven starts acting up. Temperature drifts up and down unexpectedly. Coating comes out hard in one corner and soft in another. Defects multiply but the root cause stays hidden for days. The frustration is real because the oven looks fine from the outside—it's working, it's hot, it's doing something. But "something" isn't the same as "working correctly."
The stakes are higher than you might think. An under-cured coating fails adhesion tests. An over-cured coating looks dull or gets brittle. Both outcomes mean rework, wasted powder, frustrated customers, and schedules slipping. On top of that, a neglected oven becomes increasingly inefficient. It takes longer to reach temperature. It burns more energy. It develops hot spots and cold zones that require your operators to slow down the line speed just to get acceptable results.
From our experience at Ketu, the factories that avoid these problems maintain their ovens on a schedule, not on an emergency basis. They don't wait for something to break. They know that catching a worn heating element, a drifting temperature sensor, or a sealed-up exhaust before it causes a production crisis saves thousands in downtime and scrap.
Daily and Weekly Inspection Checklist for Curing Ovens
Daily Visual Checks and Safety Verifications
Every morning before the line starts, spend ten minutes on these checks. This is not optional. These are the observations that catch 80% of problems early.
Temperature display stability. When you power up the oven, watch the control panel. Does the temperature reading sit steady, or does it fluctuate wildly within the first few minutes? A stable reading after warm-up is normal. Erratic jumping suggests a sensor issue or electrical noise.
Visual inspection of seals. Open the oven door (when it's safe and powered down) and look at the door gasket. Is it cracked, compressed, or peeling away from the frame? A compressed or damaged seal leaks hot air and makes the oven work harder to reach setpoint temperature. If the gasket looks degraded, flag it for replacement during the next scheduled maintenance window.
Exhaust outlet observation. Step outside and look at the oven exhaust. Is hot air flowing visibly, or does it seem weak? Is there powder dust accumulation around the exhaust opening? A blocked or partially blocked exhaust forces the oven to work at higher energy levels and creates back-pressure that affects air circulation inside the chamber.
Abnormal noise or vibration. Listen to the hot air circulation fan when it's running. Normal operation produces steady airflow sound. Grinding, squealing, or rattling usually means bearing wear, fan blade contamination, or loose mounts. Do not ignore vibration you can feel through the structure.
Power and safety indicators. Confirm that all indicator lights are functioning. Check that emergency stop buttons are accessible and responsive. Verify that the oven's interlock systems (door safety switches, over-temperature alarms) are working.
Ductwork and connection points. Walk around the oven and visually check all flexible and rigid ductwork connections. Look for loose clamps, cracks in ducts, or visible powder accumulation. Any separation at a joint reduces efficiency and increases energy consumption.
Weekly Functional Tests and Parameter Monitoring
Once per week, go deeper. These tests take 20–30 minutes but reveal issues that daily observation misses.
Temperature rise time measurement. In an unloaded state (no workpieces on the line), note the time it takes for the oven to rise from room temperature to setpoint. Compare this against your baseline from when the oven was new or freshly commissioned. A significant increase—say from 35 minutes to 50 minutes—suggests heating element degradation, insulation compromise, or fan efficiency loss.
Temperature uniformity spot check. Use a non-contact infrared thermometer to measure surface temperature at multiple points inside the oven chamber: center, corners, high, and low positions. All points should fall within a 10–15°C range of your target setpoint. If some zones read 20°C below target while others sit 20°C above, you have a circulation problem or heating element imbalance.
Sensor accuracy verification. If you have access to a calibrated reference thermometer or a portable oven probe, compare the oven control display against this independent measurement. A drift of more than 5°C between display and actual temperature warrants sensor recalibration or replacement.
Air circulation assessment. Turn on the blower system without firing the heating elements. Place your hand near the internal exhaust outlet. Air should flow steadily and feel strong. Weak flow indicates blower wear or internal blockage.

Filter element inspection. If your oven has intake air filters (to keep dust out of the heating chamber), inspect them visually. Dust buildup reduces airflow and forces the fan to work harder. If visible dust is heavy, schedule filter cleaning.
Visual check of heating elements (if accessible). If your oven design allows safe visual access to the heating tubes or resistive heating coils, look for visible corrosion, burn marks, or scale buildup. Discoloration beyond normal oxidation can indicate imminent failure.
| Inspection Point | Daily Check | Weekly Test | Action Threshold |
|---|---|---|---|
| Temperature display stability | Visual—steady reading? | Compare to baseline | Erratic flickering → Service sensor |
| Door gasket condition | Visual—cracks or compression? | — | Visible damage → Replace |
| Exhaust flow | Visual and tactile | Measure air velocity | Weak flow → Clean ductwork |
| Fan noise/vibration | Listen for grinding | Measure fan current draw | Audible grinding → Service bearings |
| Temperature uniformity | — | Multi-point IR check | >15°C variance → Adjust air distribution |
| Sensor accuracy | — | Compare to reference probe | >5°C drift → Recalibrate or replace |
| Heating element appearance | Visual (if safe) | — | Severe corrosion → Plan replacement |
Core Component Maintenance: Heating Elements, Controls, and Circulation Systems
Heating Elements and Temperature Control Systems
The heating element is the muscle of your curing oven. Whether you're running electric resistance heating or gas-fired burners, understanding what can go wrong is half the battle.
Electric heating element maintenance. Electric heating elements resist corrosion well compared to other materials, but they are not immune. If your oven operates in a humid environment or has poor sealing, moisture can condense inside during idle periods and accelerate surface oxidation. Visible orange or dark brown discoloration is normal. White chalky buildup or actual pitting, however, signals degradation.
Check the element's electrical continuity annually. Over time, internal resistance increases—sometimes due to scale, sometimes due to microcracking in the element material itself. This means the element draws more current to reach the same temperature, wasting energy and producing uneven heat. Replacement is straightforward: after the element has cooled and the power is disconnected, the element typically unscrews or unbolts, and a new one takes its place in 30 minutes.
Gas burner maintenance. If you're running a gas-fired oven, combustion cleanliness is critical. Burner orifices can clog with mineral deposits or corrosion products, leading to uneven flame pattern and hot spots. Annually, have the burner cleaned professionally. The nozzle diameter directly affects flame shape and heat distribution.
Check the combustion air intake for blockages. Lint, powder dust, or debris around the air inlet reduces oxygen supply to the flame, creating incomplete combustion, poor heat output, and potentially hazardous carbon monoxide formation. Keep the air intake clear.
Temperature sensor (thermocouple or RTD) maintenance. Your oven's temperature control depends entirely on the accuracy of its sensor. Over months of operation, the sensor can drift, especially if it's exposed to thermal shock (rapid temperature swings) or if the probe tip is covered with scale or powder residue.
From our experience at Ketu, one of the most common mistakes clients make is not scheduling sensor recalibration. They assume the control display is always correct. But we've seen cases where a sensor had drifted 10°C without the operator noticing—resulting in chronically under-cured coatings and adhesion failures that took weeks to diagnose.
Replace or recalibrate your sensor every 12–18 months, depending on usage intensity. If your oven supports dual-sensor redundancy (one main, one backup for safety), verify both are reading consistently.
Control system and electronics. The PLC or temperature controller that manages your oven is usually very reliable, but power surges, thermal stress, and moisture can degrade circuit boards and relays. Inspect the control cabinet for:
- Dust accumulation on components (blocks cooling airflow)
- Loose terminal connections (vibration can shake connections loose over time)
- Burnt or discolored circuit board areas (sign of electrical overstress)
- Corroded relay contacts (especially in high-humidity facilities)
Clean dust filters on the control cabinet fan monthly. If your facility is near the coast or in a highly corrosive environment, consider conformal coating on exposed circuit boards to resist salt-air corrosion.
Hot Air Circulation Fans and Ductwork Maintenance
The hot air circulation fan is the circulatory system. Without it, heat pools in certain zones and bypasses others.
Fan bearing wear. The blower bearing is under constant thermal stress. It runs hot, spins fast, and rarely gets lubricated (most modern designs are sealed). Over 2–3 years of continuous use, bearings wear. You'll notice this first as a slight vibration, then as audible squealing or grinding.
Bearing replacement is not optional—waiting until it fails seizes the fan, stalls the motor, and can damage the motor shaft. Schedule bearing inspection every 18 months. If you feel side-to-side play in the fan shaft (after the motor is powered down and cooled), the bearing has play and should be replaced soon.
Impeller blade inspection. Powder dust, if it gets into the circulation system, coats the fan blades. This buildup is unbalanced mass, causing vibration and reducing fan efficiency. Inspect the impeller every 3 months. If you see visible dust accumulation, the fan needs cleaning. This usually requires partial disassembly but is faster than replacing the whole fan assembly.
Ductwork sealing. Hot air ducts inside and around the oven expand and contract with thermal cycles. Over time, joints separate, seals crack, and fasteners loosen. Even small leaks bypass precious hot air and reduce the effective temperature inside the chamber.
Walk the entire ductwork route monthly. Look for daylight showing through joints or seams. Feel around ducts for leaking warm air. Use high-temperature silicone sealant to plug small leaks. If a joint has recurrent separation, the ductwork may need re-support or realignment.
Exhaust line clearing. The exhaust duct leading from the oven to the outside can accumulate powder residue, lint, or moisture condensation (especially in cool morning startups). A partially blocked exhaust increases back-pressure, forcing the fan to work harder and reducing circulation effectiveness inside the chamber.
Inspect the exhaust line quarterly. If you feel weak exhaust flow at the exterior outlet, the line needs cleaning. This sometimes requires temporary disconnection and flushing with compressed air or a brush.

Insulation Materials and Chamber Sealing
The insulation layer is your oven's thermal blanket. If it degrades, energy efficiency plummets and temperature consistency suffers.
Insulation inspection. Most industrial curing ovens use mineral wool, ceramic fiber, or rockwool insulation sandwiched between inner and outer steel shells. Over years of thermal cycling, this material can settle, compress, or become damp.
Visually inspect the oven exterior. If you see temperature gradients (one area of the outer shell feels significantly hotter than another), insulation may be compromised or unevenly distributed in that zone. Thermal imaging can confirm this—a proper oven should show fairly uniform exterior temperature across all faces.
If you detect cold spots on the exterior (cooler zones), insulation may be missing or compressed. This is an efficiency drain that costs real money in wasted energy. Schedule partial disassembly and reinspection.
Moisture in insulation. If your oven is in a humid climate or if the facility has experienced water leakage near the oven, moisture can be trapped inside the insulation. Damp insulation loses R-value and conducts more heat outward. Additionally, trapped moisture eventually rusts the inner steel shell from the inside, a slow disaster that's hard to catch.
If you suspect moisture, use a moisture meter on the outer shell if you can gain access to interior surfaces. If moisture is detected, the oven should be professionally dried out and the sealing improved.
Chamber door and seals. The door is the biggest source of heat loss. A worn door gasket leaks hot air, lets in cool ambient air (creating drafts inside), and forces the oven to overshoot its setpoint trying to maintain steady temperature.
Replace the door gasket every 2–3 years, even if it doesn't look obviously damaged. The material hardens and loses compressibility with age. Also, check that the door hinges are tight and the door aligns properly in the frame. A misaligned door leaves gaps that act like continuous cold air leaks.
Key Differences in Maintaining Gas-Fired vs. Electric Curing Ovens
The core maintenance principles apply to both, but the details differ. I've worked with both types, and the failure modes are distinctly different.
Gas-fired ovens depend on clean, precise combustion. The burner's primary concerns are nozzle cleanliness, air supply, and exhaust venting. A plugged burner orifice starves the flame of fuel, and combustion becomes incomplete—less heat output, higher fuel consumption, and accumulation of unburned gases.
If your gas oven is not reaching temperature as quickly as it used to, the first suspect is burner fouling. Have the burner professionally cleaned. Gas also requires a safe exhaust path; if your oven's exhaust line is blocked or undersized, combustion products back up, creating safety hazards and reducing draft.
Gas-fired ovens also need annual inspection of the gas regulator, shut-off valve, and safety interlock (which should shut off gas if the pilot light goes out or combustion fails). These are not field maintenance items—hire a certified technician. But knowing they exist and scheduling the inspection is your responsibility.
Electric ovens are mechanically simpler but more sensitive to electrical stress. The heating elements degrade gradually, and the control electronics are vulnerable to power surges and thermal cycling stress. However, there's no combustion process to maintain, no gas safety checks, and no exhaust venting to worry about.
Electric ovens' main vulnerability is insulation and sealing—they lose efficiency if the shell insulation is compromised because there's no active exhaust draft to help retain heat. A gas oven's natural draft provides some passive heat retention even if the door is slightly ajar; an electric oven's lack of draft means even a small seal leak is more noticeable.
Cost perspective. Gas-fired ovens typically have lower per-unit energy cost (natural gas is cheaper than electricity in many regions), but they demand more frequent burner maintenance. Electric ovens have higher operating cost per kilowatt-hour but lower maintenance complexity. When budgeting, factor in annual burner service for gas ovens; that's a line item electric ovens don't have.
Temperature Uniformity Issues: Diagnosis and Corrective Actions
This is where most of the real-world maintenance payoff happens. Temperature uniformity directly affects your coating quality.
Identifying Root Causes (Uneven Heating, Temperature Fluctuations)
If your finished parts show consistent quality but measurements show the oven's actual workpiece temperature varies from one zone to another, you have a distribution problem, not a power problem.
Symptom: Parts in one corner cure properly; parts in another corner are under-cured. This almost always points to air circulation imbalance. The oven may have hot air inlets on one side and exhaust on the other, and if the inlet is partially blocked or the exhaust is congested, airflow patterns become uneven.
First step: map the airflow by watching where dust or lightweight items flow inside the chamber (with the oven running but no workpieces). If air seems to bypass certain zones, you've found your culprit. The fix is usually repositioning the inlet baffles, clearing the exhaust, or in some cases, adding internal air directors to force circulation to dead zones.
Symptom: Temperature overshoots setpoint dramatically, then drifts down, cycling in a wide band. This usually indicates a sensor issue or control loop tuning problem, not a heating problem. The sensor might be reading temperature at a location that doesn't represent the chamber average, or the controller's proportional-integral-derivative (PID) tuning values have drifted.
Check sensor placement. Is it truly in the middle of the chamber, away from direct heat sources and exhaust? If the sensor is reading a hot spot, it causes the controller to shut off heating prematurely when the average temperature is still below setpoint.
If sensor placement is correct, the control algorithm may need retuning. This is typically done during commissioning and should not need adjustment unless the oven has been substantially modified. If you didn't document the original PID values, you may need to contact the oven manufacturer or hire a controls technician.
Symptom: Temperature takes 30+ minutes to reach setpoint; the rise curve is very slow and flat. This suggests heating element wear or electrical supply problems. Over time, heating element resistance increases, drawing more current for the same power output—or failing silently and no longer producing full power.
Measure the element resistance (safely, with power off) using a multimeter. Compare to the nameplate specification. An element that is 20–30% higher resistance than design spec is due for replacement. Continuing to run a degraded element wastes energy, and the element may fail suddenly mid-production.
Also verify electrical supply: confirm that the oven is receiving full voltage at the terminal block. Some facilities have undersized power distribution, and if other equipment starts up in the facility, your oven's voltage dips slightly, reducing heating power.
Troubleshooting Steps for Temperature Control Problems
Here's the sequence I recommend when temperature control goes sideways:
Step 1: Rule out the sensor first. Shut down the oven safely, allow it to cool. Remove the temperature sensor (thermocouple or RTD probe). Inspect the tip for corrosion, scale, or powder buildup. Clean gently with a soft brush. Reinstall and re-power.
Run the oven to setpoint and check if the wild swings smooth out. Many temperature instabilities resolve after sensor cleaning alone.
Step 2: Verify the sensor is reading correctly against a reference. Use an independent thermometer probe (not the oven's built-in display) to measure actual chamber temperature. Compare the oven's displayed reading to the reference. If they differ by more than 5°C, the sensor needs calibration or replacement.
Step 3: Check heating element output. With power on and the oven running, measure voltage at the element terminals (do this carefully or have an electrician do it). Compare to nameplate voltage. If significantly lower, the power supply or internal wiring is suspect. If voltage is correct, measure current. Compare to nameplate amperage. If current is much lower than spec, element resistance is too high and replacement is due.
Step 4: Inspect air circulation. Listen to the blower fan. Does it sound normal, or is there grinding or squealing? Turn off the oven and measure resistance between the fan motor windings if you have access. Abnormal resistance indicates motor fault.
Also feel the ductwork and exhaust outlet for air pressure and flow rate. Weak flow despite a healthy fan often means blockage. Trace the ductwork for bends, crushing, or loose sections.
Step 5: Check door seal. Open the door (cooled, powered down) and look at the gasket. Is it compressed, hardened, or missing in spots? A failing door seal is a silent energy drain and will destabilize temperature.
Step 6: Monitor with data logging (if available). If your oven has data logging or remote monitoring, enable it for a full production day. The data will show you the exact behavior: Is temperature rising smoothly then holding? Or is it oscillating erratically? The shape of the temperature curve tells you a lot. A smooth curve suggests control is working; rapid cycling suggests sensor noise or aggressive PID tuning.
If you don't have built-in logging, a wireless temperature logger placed inside the empty oven for a test run can provide the same insight.
Scheduled Maintenance Intervals: Planning Your Preventive Care Program
Maintenance works best when it's planned, not reactive. Here's a framework we recommend at Ketu for customers running their ovens in typical manufacturing environments.
Monthly Deep Cleaning and Component Inspection
Dust and debris removal. Monthly, shut down the oven and allow it to cool completely. Open access panels and vacuums out accumulated dust and powder particles from the interior, especially around heating elements and the blower intake. This improves heat transfer and reduces fire risk (powder dust is combustible in suspended form, though low concentration in a large oven chamber is not typically hazardous, it's still good practice to control).
Visual inspection of all seals. Look at the door gasket, ductwork joints, and any removable inspection panels. Tighten fasteners on ductwork that may have vibrated loose. Apply high-temp sealant to any small cracks or gaps.
Blower inlet filter cleaning. If the oven has an intake filter (many modern designs do), inspect it. If you see dust buildup, clean it with compressed air or replace if it's damaged. A clogged filter reduces blower efficiency and can cause the motor to overheat.
Exterior casing inspection. Walk around the oven and look for external damage: dents, corrosion, loose panels, or signs of overheating (discoloration of painted surfaces). Address any obvious issues.
Control panel cleanliness. Dust the control cabinet, confirm ventilation slots are open, and check that cooling fans (if present) are clear. Overheated control electronics fail unpredictably and expensively.
Quarterly and Annual Overhauls
Quarterly (every 3 months). For ovens in continuous operation:
- Sensor accuracy check (compare to independent reference thermometer)
- Temperature uniformity mapping (multi-point check inside chamber)
- Exhaust line inspection and cleaning
- Heating element visual inspection
- Door alignment and seal condition
- All accessible fasteners tightened
Annual (once per year). For ovens running 8+ hours daily:
- Professional burner cleaning and inspection (gas ovens only)
- Heating element resistance measurement and evaluation for replacement planning
- Control sensor recalibration or replacement
- Insulation condition assessment (look for settling or moisture)
- Bearing inspection and lubrication (if applicable)
- All gaskets, seals, and door hinges replaced if showing wear
- Electrical system inspection (voltage supply, wiring, contacts)
- Safety interlock functional test
- Energy consumption baseline measurement (compare to original; significant increase flags inefficiency)
For ovens in lower-use environments (part-time, seasonal, or intermittent), extend quarterly tasks to every 6 months and annual tasks to every 18 months.
| Interval | Task | Time Required | Priority |
|---|---|---|---|
| Daily | Visual checks: temperature, seals, noise, exhaust | 10 min | Critical |
| Weekly | Temperature uniformity, sensor drift check | 20–30 min | High |
| Monthly | Deep clean, inspect all seals, check filters | 1–2 hours | High |
| Quarterly | Heating element inspection, exhaust cleaning, door check | 2–3 hours | Medium |
| Annually | Full sensor recalibration, burner service, bearing inspection | 4–6 hours | High |
Common Curing Oven Failures: Troubleshooting and Emergency Response
Failure Modes and Diagnostic Procedures
Most oven failures fall into a few categories. Knowing them helps you respond fast.
Temperature will not rise above room temperature. The oven is on, the control shows it's trying to heat, but the chamber stays cold.
- Most likely cause: Heating element failure (electric) or pilot light out / fuel supply blocked (gas).
- Diagnosis: Shut down, allow to cool. Measure element resistance (electric) or check pilot light / gas supply (gas). For electric, an open-circuit reading (infinite resistance) means total element failure. For gas, relight the pilot following manufacturer procedure. If pilot won't light, gas supply may be blocked or the ignition electrode may need cleaning.
- Immediate action: If electric element failed, the oven is out of service until replacement (4–8 hours for a technician). If gas supply is blocked, check for debris in the fuel line or a partially closed shut-off valve. If pilot electrode is fouled, clean carefully with a soft brush.
Temperature overshoots setpoint drastically (e.g., setpoint 200°C but reaches 230°C) then shuts off completely and won't recover. This usually indicates a thermostat or control failure, not a sensor drift—it's a more dramatic problem.
- Likely cause: Thermostat stuck open (heating runs continuously) or control relay failed.
- Diagnosis: This requires electrical troubleshooting. Check that the control display is reading reasonable values. If the display shows 200°C but you measure 230°C inside, the sensor is reading low and the controller is over-heating to compensate. If the display reads 230°C and matches actual temperature, the thermostat or relay is stuck.
- Immediate action: Kill power to the oven immediately (overshoot can damage elements and degrade insulation). Do not restart until the control system has been inspected by an electrician. Running overshoot is a fire and safety risk.
Oven temperature is unstable; it swings ±20°C around setpoint continuously. The heating and cooling cycle is erratic and wide.
- Likely cause: Sensor drift, poor sensor placement, or control loop tuning issue.
- Diagnosis: As outlined in earlier troubleshooting steps, verify sensor accuracy against an independent thermometer. Check that the sensor is in the center of the chamber, not in a draft or near a heat source. If the sensor is correctly placed and accurate, contact the oven manufacturer or a controls technician; PID tuning may need adjustment.
- Immediate action: This is not an emergency, but it does reduce coating consistency. Slow the line speed slightly to allow longer dwell time and reduce the impact of temperature variance. Schedule sensor service for the next maintenance window.
Oven shuts off unexpectedly during production (especially on gas units). The flame extinguishes, temperature drops, and the unit won't restart without manual reset.
- Likely cause: Safety interlock triggered (e.g., flame failure sensor detected no pilot, or thermal cutoff activated due to overheat). Less common: fuel supply interruption.
- Diagnosis: Check the oven control panel for fault codes or indicators. Many ovens have a status light that shows what triggered shutdown. If it's a flame failure, the pilot or burner electrode may need cleaning. If it's an overheat cutout, check that the exhaust is not blocked and that the oven is not in a dangerously hot location.
- Immediate action: Do not repeatedly try to restart. Each restart attempt without solving the underlying issue can damage components. Identify the fault, correct it, then attempt one restart. If it fails again, stop and call service.
Visible flame (on gas units) appears yellow/orange or sooty instead of bright blue; heat output feels low. Incomplete combustion.
- Likely cause: Burner nozzle is partially blocked, or combustion air intake is restricted.
- Diagnosis: Inspect the burner nozzle (safely, with gas shut off) for corrosion, carbon buildup, or debris. Also check the combustion air intake duct for blockages.
- Immediate action: Clean the nozzle carefully with a thin wire or compressed air. Clear the air intake. Restart and observe flame color. Bright blue = healthy. If flame remains yellow/orange after cleaning, the nozzle may need professional replacement.
When to Replace vs. Repair Critical Components
This is the practical question: Is it worth fixing, or is it time to replace?
Heating elements. If an element is past 80% of its design life (typically 10–15 years of continuous use), and you're seeing visible corrosion, scoring, or if resistance measurements show >20% increase over spec, replacement is better than repair. A worn element will fail again within months. Cost of replacement: $500–$2,000 depending on oven size and element type. Downtime: 4–8 hours.
A fresh element improves efficiency, improves temperature stability, and reduces energy consumption. Budget it as maintenance, not emergency repair.
Blower motor and bearings. If the blower motor is making grinding noise or the shaft has side-play, bearing replacement is urgent. Waiting risks motor seizure, which can damage the shaft or motor windings and push repair cost to $3,000+. Proactive bearing replacement: $1,000–$1,500 and 2–3 hours. This is worth doing early.
Insulation. If a large area of insulation is wet, compressed, or missing, localized repair (removing, replacing, resealing) is cost-effective: $1,000–$2,000 and 1–2 days labor. Replacing the entire insulation layer is a major undertaking ($5,000–$10,000) and should be done only if damage is widespread or the oven is very old.
Temperature sensor. Sensors drift or fail gradually. A recalibration or replacement is cheap (~$300–$600) and easy. Replace it proactively every 2 years. This prevents the chronic under-curing or overshoot problems that waste far more money in scrap coating than the sensor replacement costs.
Control electronics. If the control board shows visible burn marks, corroded connections, or if the oven is refusing all commands and resetting randomly, the board likely needs replacement. Cost: $1,500–$3,000 depending on oven age and controller type. This is worth doing rather than trying to repair discrete components.
Ductwork and seals. Ductwork can be sectionally replaced. If one section is corroded or crushed beyond use, replace that section (~$200–$500). Full ductwork replacement is rarer but may be needed in very old ovens; cost $3,000–$5,000. Door gaskets should always be replaced rather than repaired; cost is trivial (~$100–$300) and benefit is immediate.
More Related Questions
How often should I calibrate my oven's temperature sensor?
Every 12–18 months for continuous-duty ovens. In less demanding applications, annual calibration is sufficient. Always recalibrate after any suspected power surge or electrical event. A 5°C drift is the typical threshold for replacement.
Can I operate my curing oven if the exhaust is partially blocked?
Technically yes, but you shouldn't. Blocked exhaust increases back-pressure, reduces circulation, creates temperature dead zones, and forces the heating system to overshoot setpoint trying to compensate. You'll also see higher energy consumption. Clear the blockage before resuming full production.
What's the typical lifespan of a curing oven?
15–20 years with proper maintenance. The core structure can outlast that, but components like heating elements, bearings, sensors, and seals degrade over time. Budgeting for annual maintenance (3–5% of oven cost per year) extends useful life significantly. Neglected ovens may fail within 5–10 years.
Should I replace my gas burner if it's working but producing a slight yellow flame?
Not immediately, but address it soon. A yellow/sooty flame indicates incomplete combustion: lower heat output, higher fuel consumption, and potential carbon monoxide risk. Clean the burner and combustion air intake first. If flame stays yellow after cleaning, the burner nozzle is probably worn and should be replaced within the next few months.
Is it normal for my oven to make a humming or buzzing sound?
A light hum from the transformer or motor is normal. Buzzing is sometimes normal too (induced vibration in certain components). Grinding, squealing, or rattling is not normal and usually indicates bearing wear or loose components. Investigate grinding or squealing within a few days to avoid catastrophic failure.
Conclusion
Curing oven maintenance is not glamorous, but it is foundational. A well-maintained oven delivers consistent temperature, stable energy consumption, reliable coating quality, and predictable uptime—the things that actually matter to your production schedule and cost structure.
We've emphasized this in our work at Ketu because we see it directly: factories that maintain their ovens systematically experience half the defects of factories that don't. The difference isn't luck. It's discipline—daily visual checks, weekly functional tests, monthly deep cleaning, and annual professional service.
The investment is small (typically 3–5% of oven acquisition cost per year). The return is large: fewer reworks, less scrap, better customer satisfaction, and equipment that lasts twice as long. Start with the daily checklist. Make it a habit. One person, ten minutes, every morning. That single habit catches 80% of emerging problems before they become production crises.
If you'd like guidance on setting up a maintenance schedule tailored to your specific oven model or production volume, our team at Ketu is ready to help. We've commissioned hundreds of coating lines across multiple industries and continents. We know what breakdowns look like, and we know how to prevent them.
Contact us to discuss your curing oven maintenance strategy:
WhatsApp: +8618925987762
Email: ketucoatingline@gmail.com
We'll help you build a maintenance program that keeps your line running smoothly.
 English
  German
  Vietnamese
  French